
This is the full path for one Telegram creator, in order. Each step is one action, one expected result, one screenshot and a link to the detailed article. Follow them top to bottom and a fan writing to the creator's Telegram profile gets a real answer from the AI.
On Telegram there is no browser extension. The bridge is a bot you create in BotFather and attach to the creator's account through Telegram Business. Fans never open that bot: they keep writing to the creator's profile.
What you need before Step 1
- A Telegram account you control, to own the bot. Not the creator's account.
- The creator's Telegram account with Telegram Premium active, and her phone at hand.
- Crypto to load your balance, or write to Greg, our CEO, for another payment method.
- Photos, videos or audio files ready to upload.
Step 1: Create your OnlyChat account
Open https://app.only-chat.ai and click Sign up. Confirm you are 18 or older, fill the four short steps of the form, then type the 6-digit code sent to your email.
Result: you land on the Creators board, empty, and your organization exists.
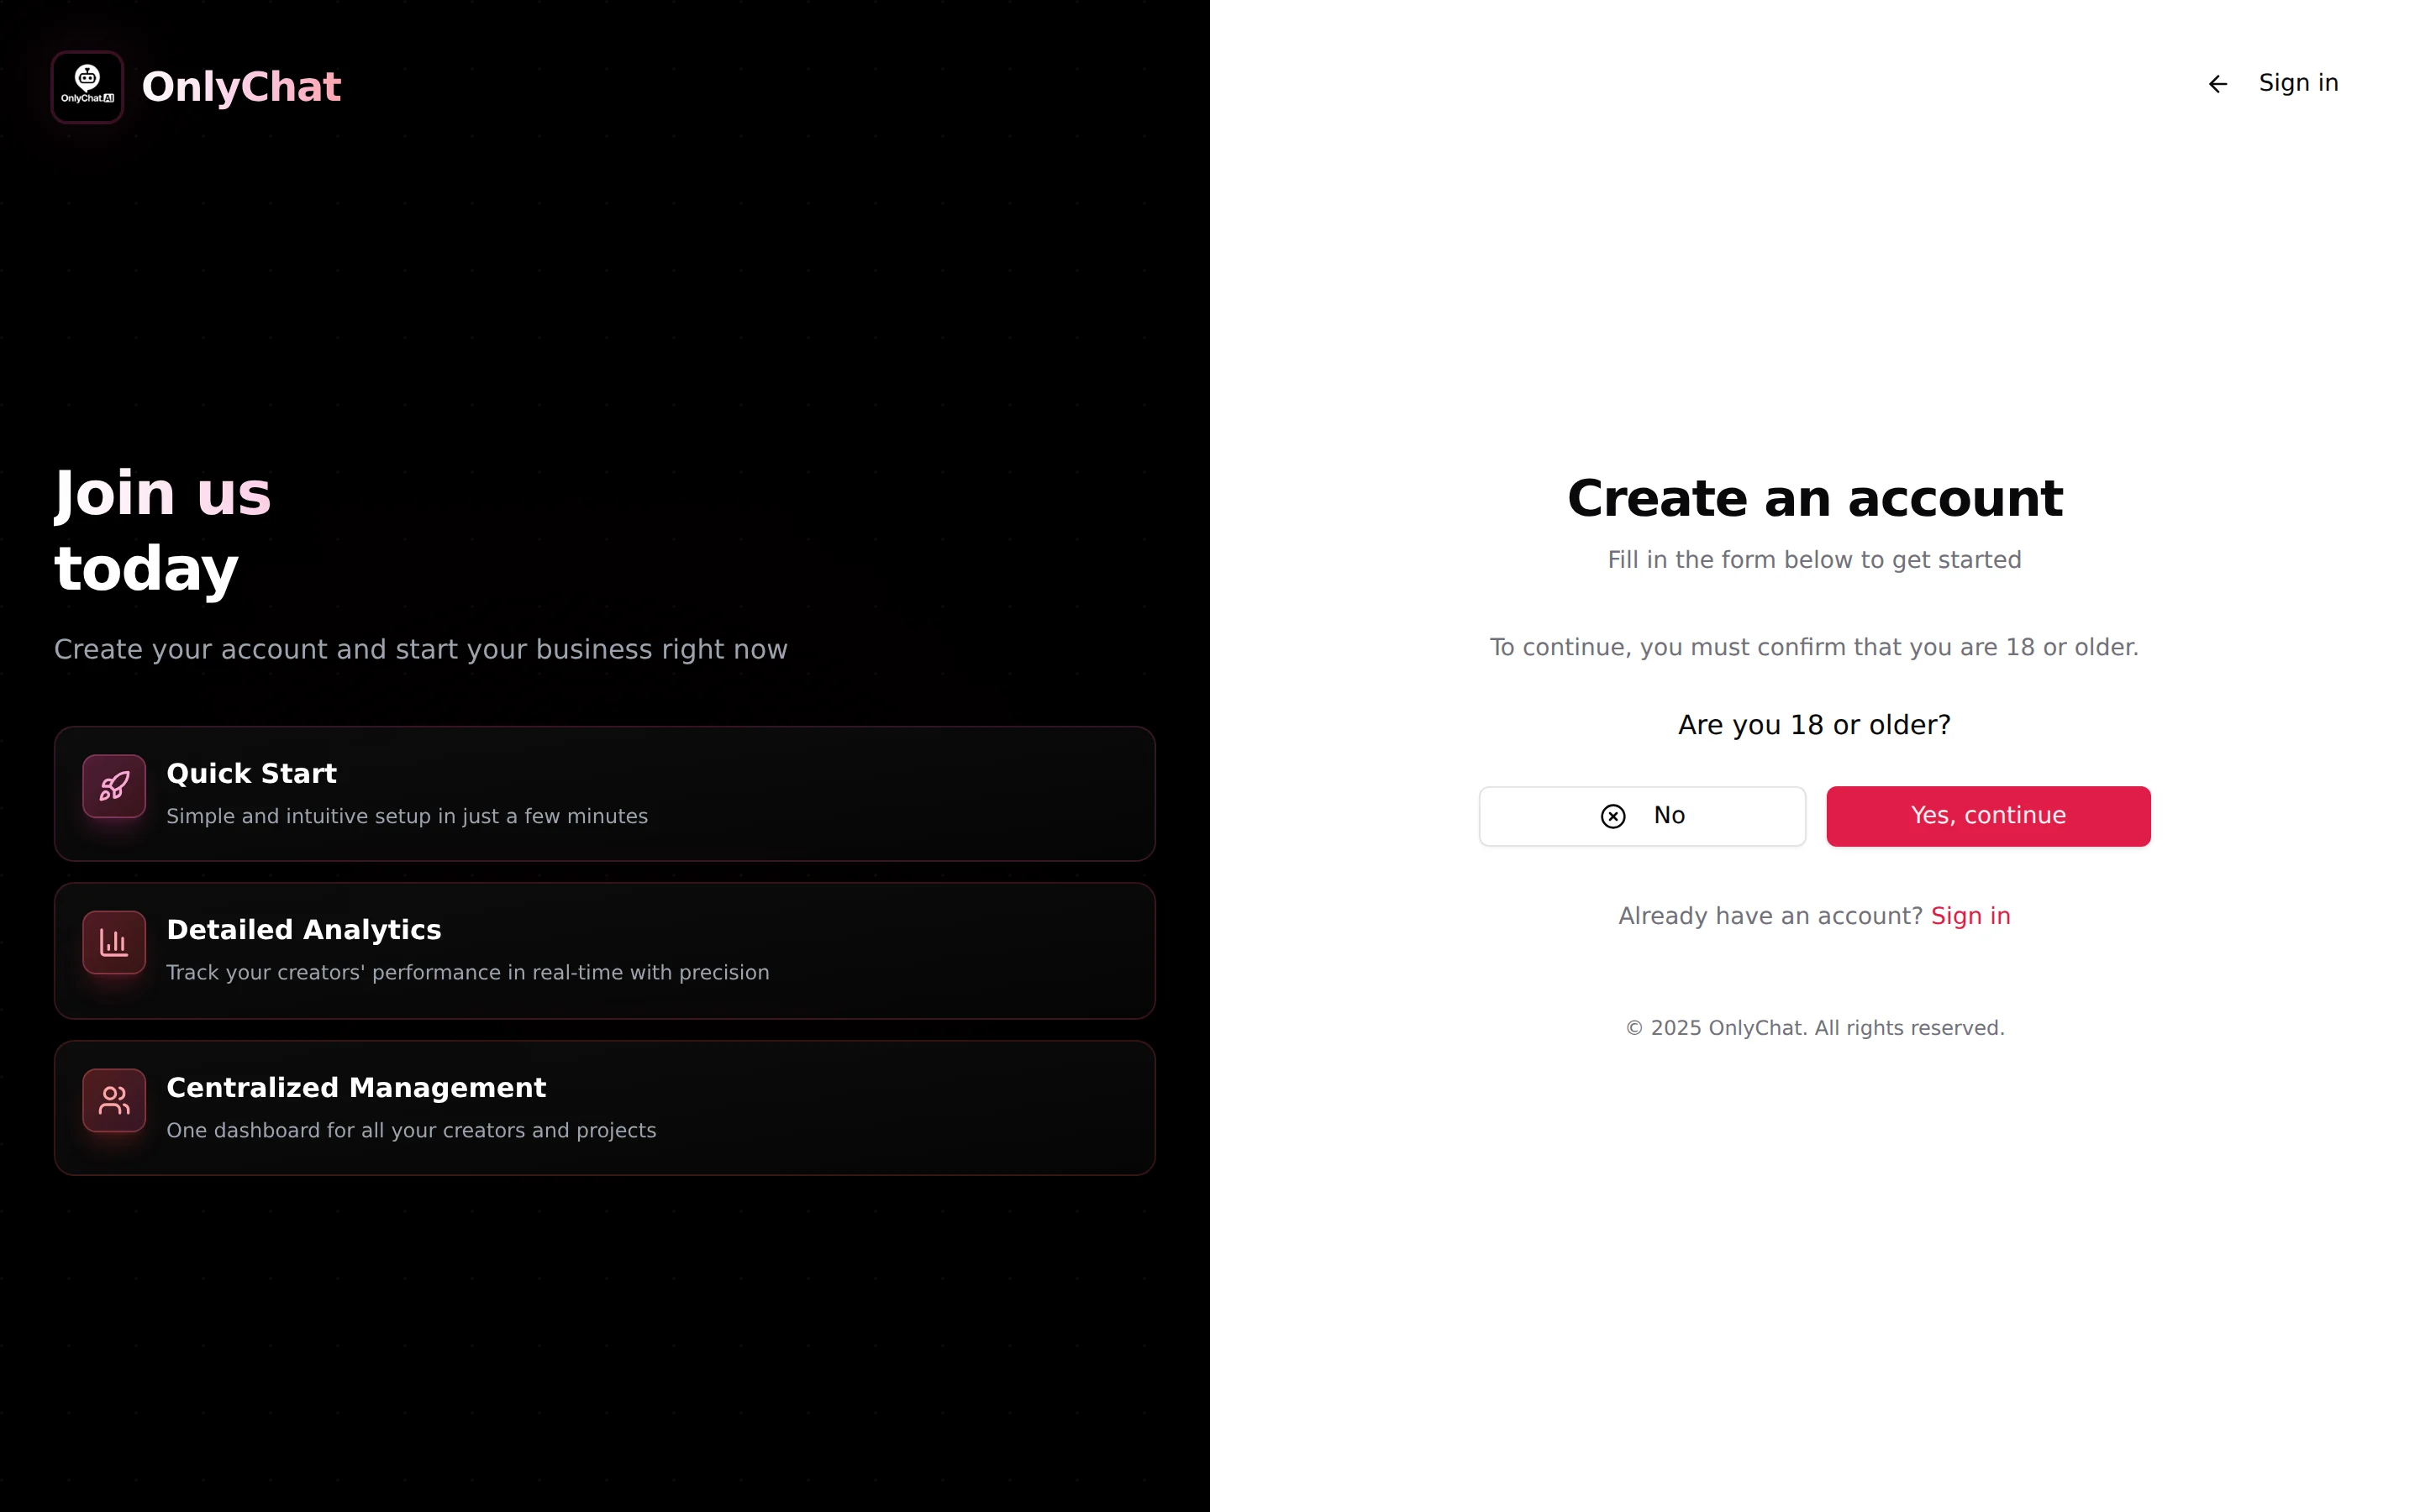
Details: Create an account
Step 2: Put money on your balance
OnlyChat is prepaid. Click Recharge in the sidebar, choose a currency, type the amount, tick the confirmation checkbox and click Create payment. Send the exact amount from your wallet, on the network of the asset you picked.
Result: the status reaches "Payment completed" and the balance in the sidebar goes up.
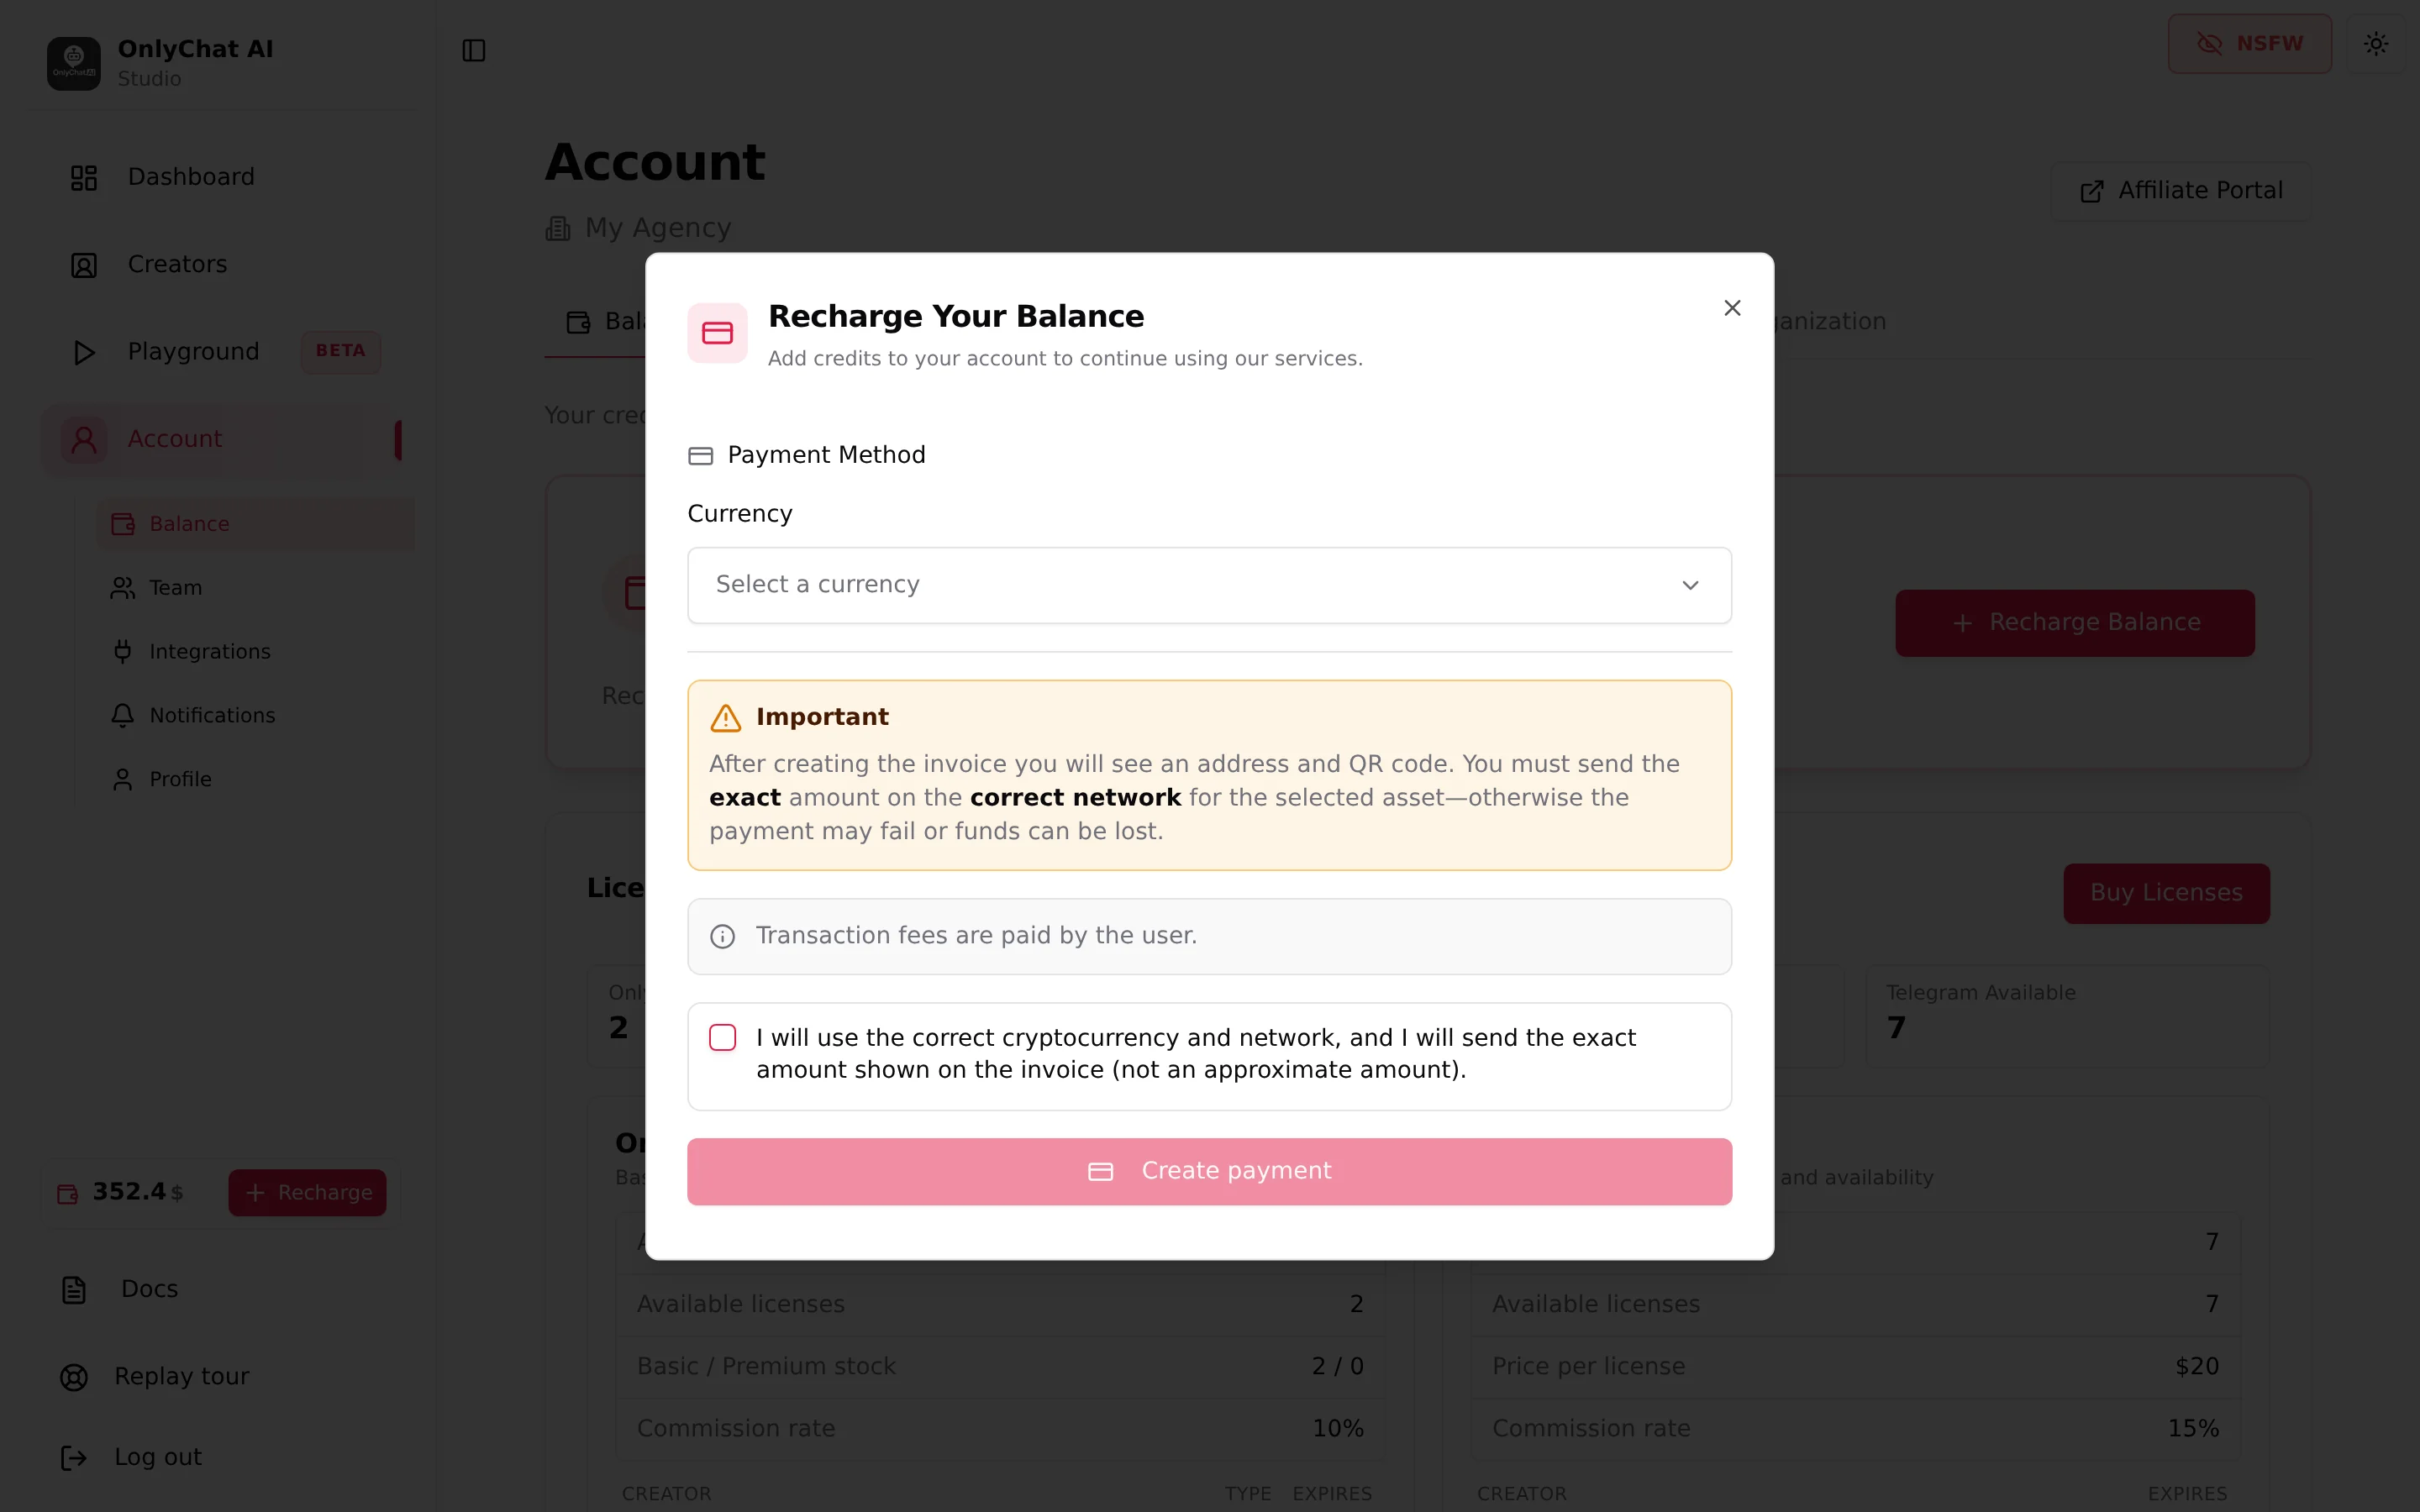
Details: Balance and licenses
Step 3: Buy a Telegram license
Telegram licenses are a pool of their own, $20 per month per creator plus 15% commission on the net revenue the AI sells. Open Account, tab Balance & Licenses, click Buy Licenses, pick Telegram, choose a single license or a bulk pack, then Confirm Purchase.
Result: the Telegram Available counter shows at least 1.
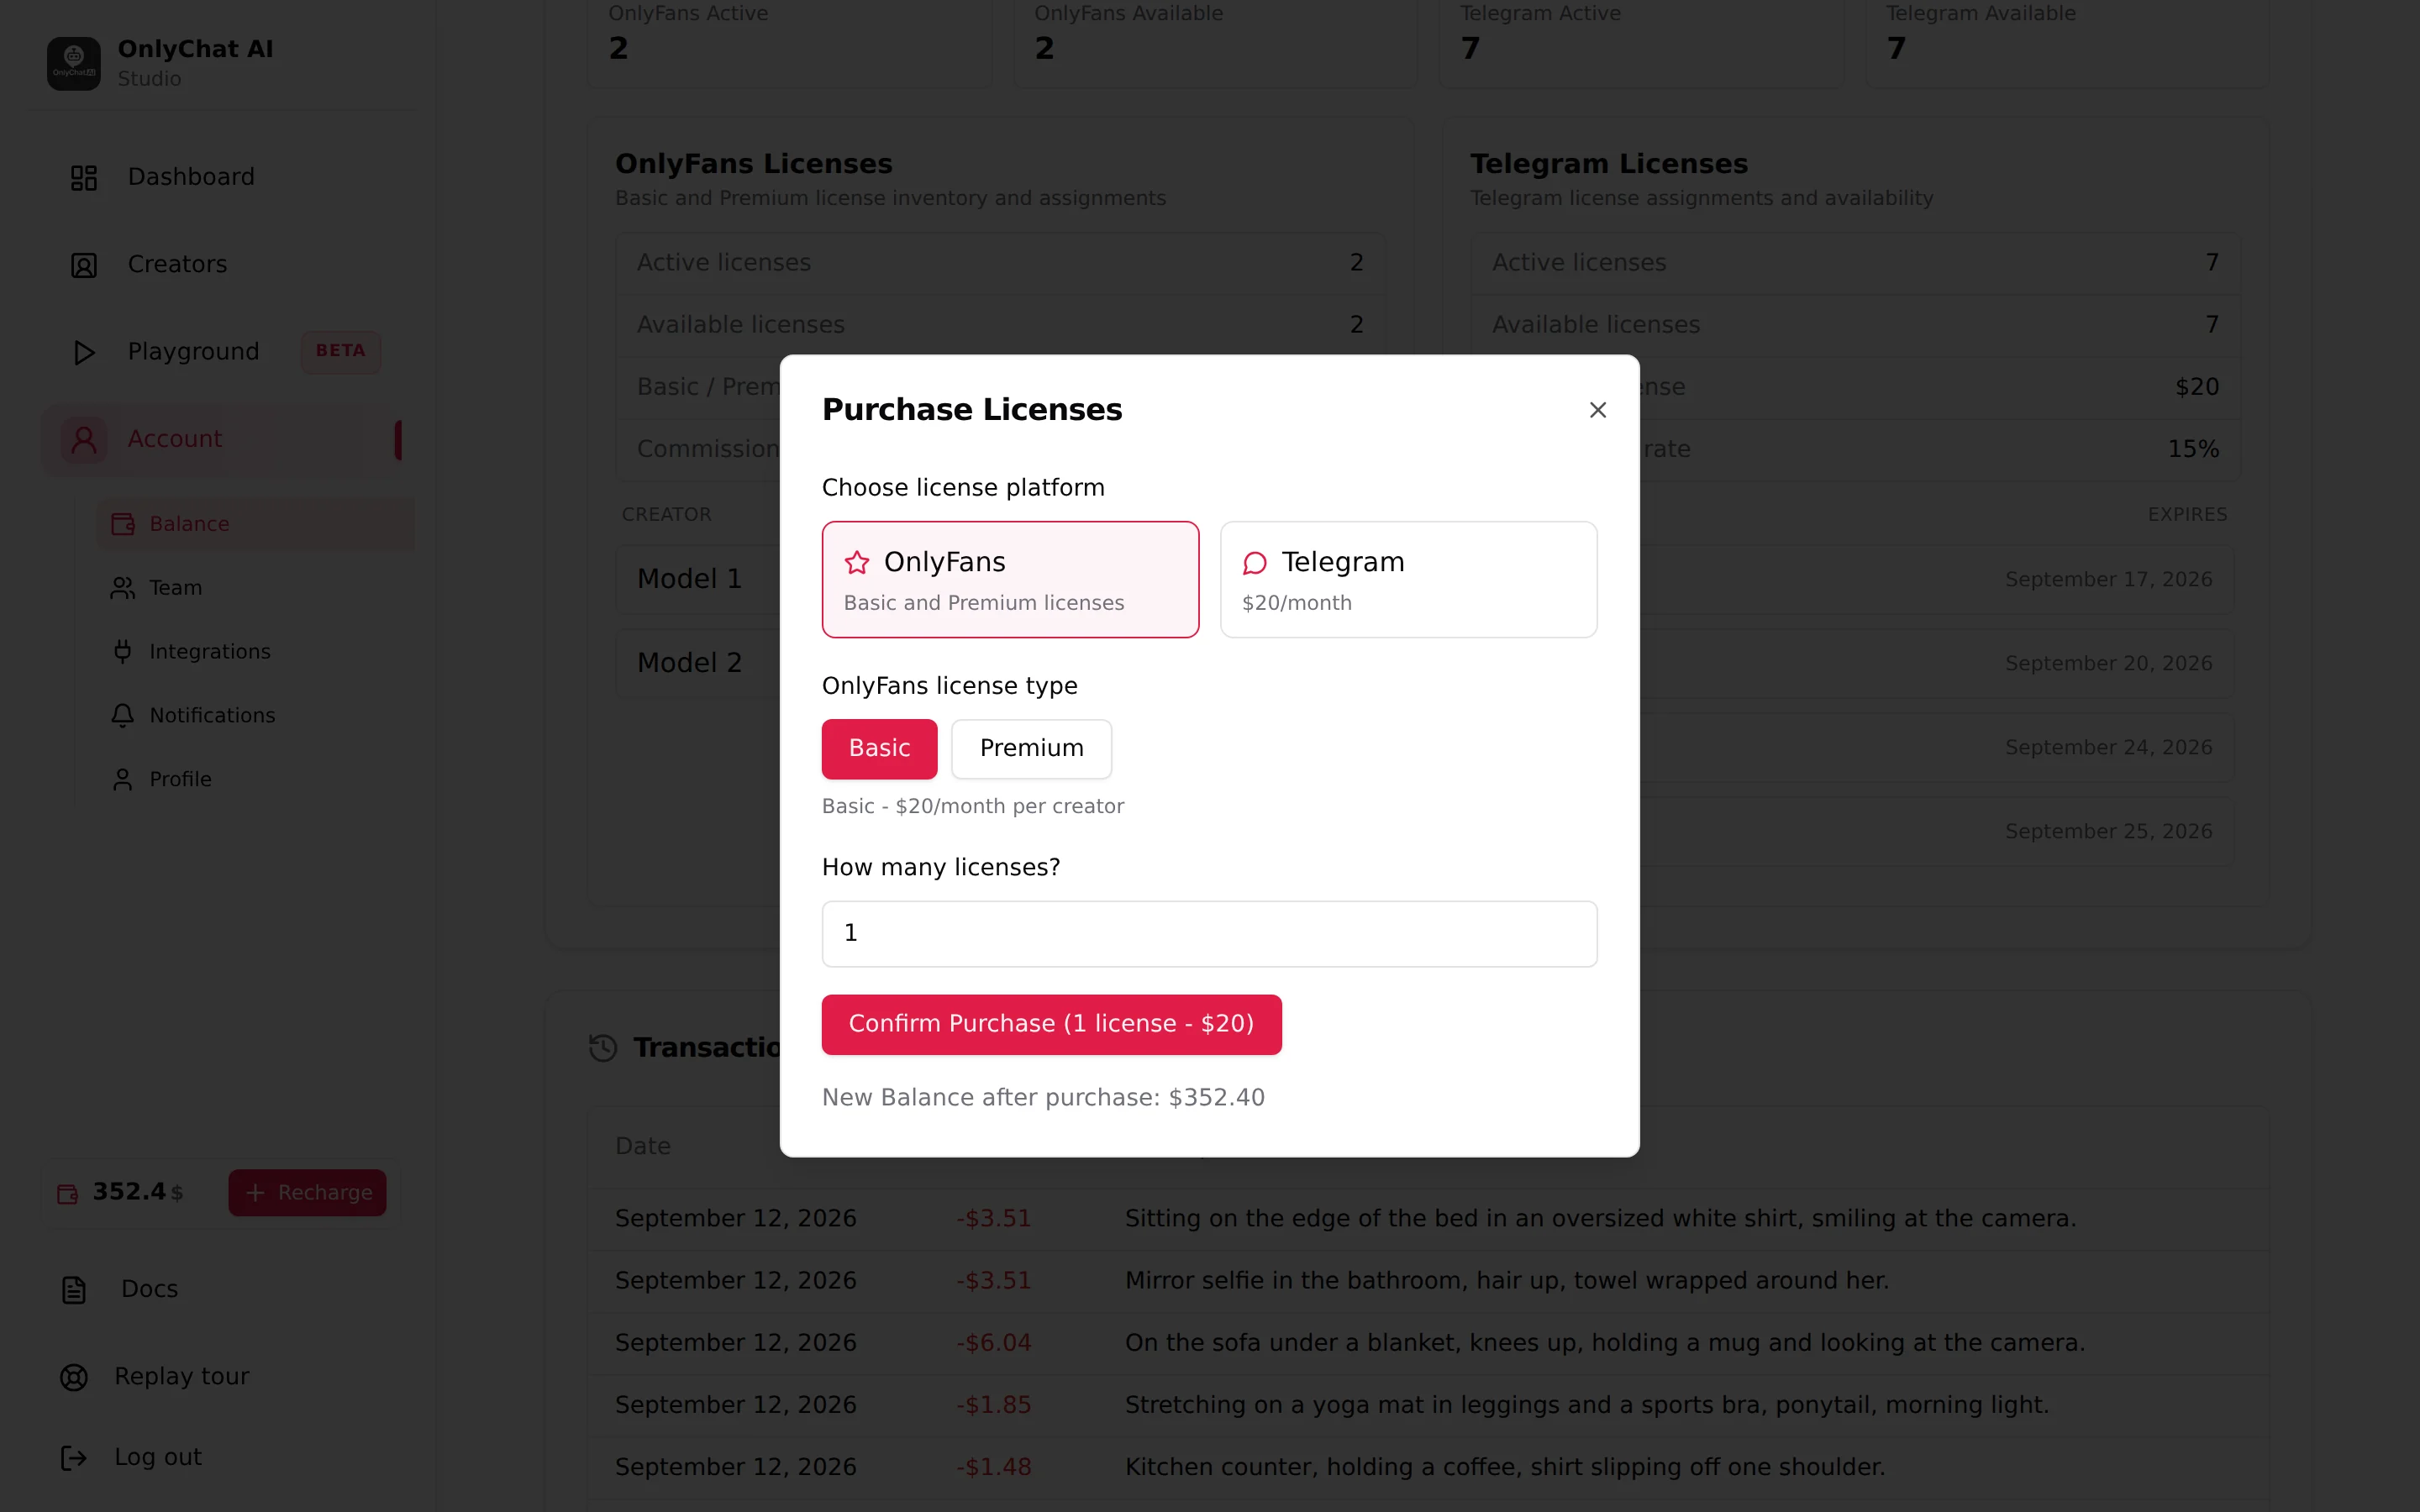
Details: Assign a Telegram license
Step 4: Create the bot in BotFather
From the account that owns the bot, open Telegram, search for @BotFather and send /newbot. Give a display name, then a username ending in "bot". BotFather answers with the token, a line that looks like 123456789:AAHxxxx. Copy the whole line and keep it safe.
Result: you hold two things, the exact @username and the token. Never create the bot from the creator's account: the owner account is the only one that can revoke the token or change Secretary Mode.
Details: Create a Telegram bot
Step 5: Add the Telegram creator
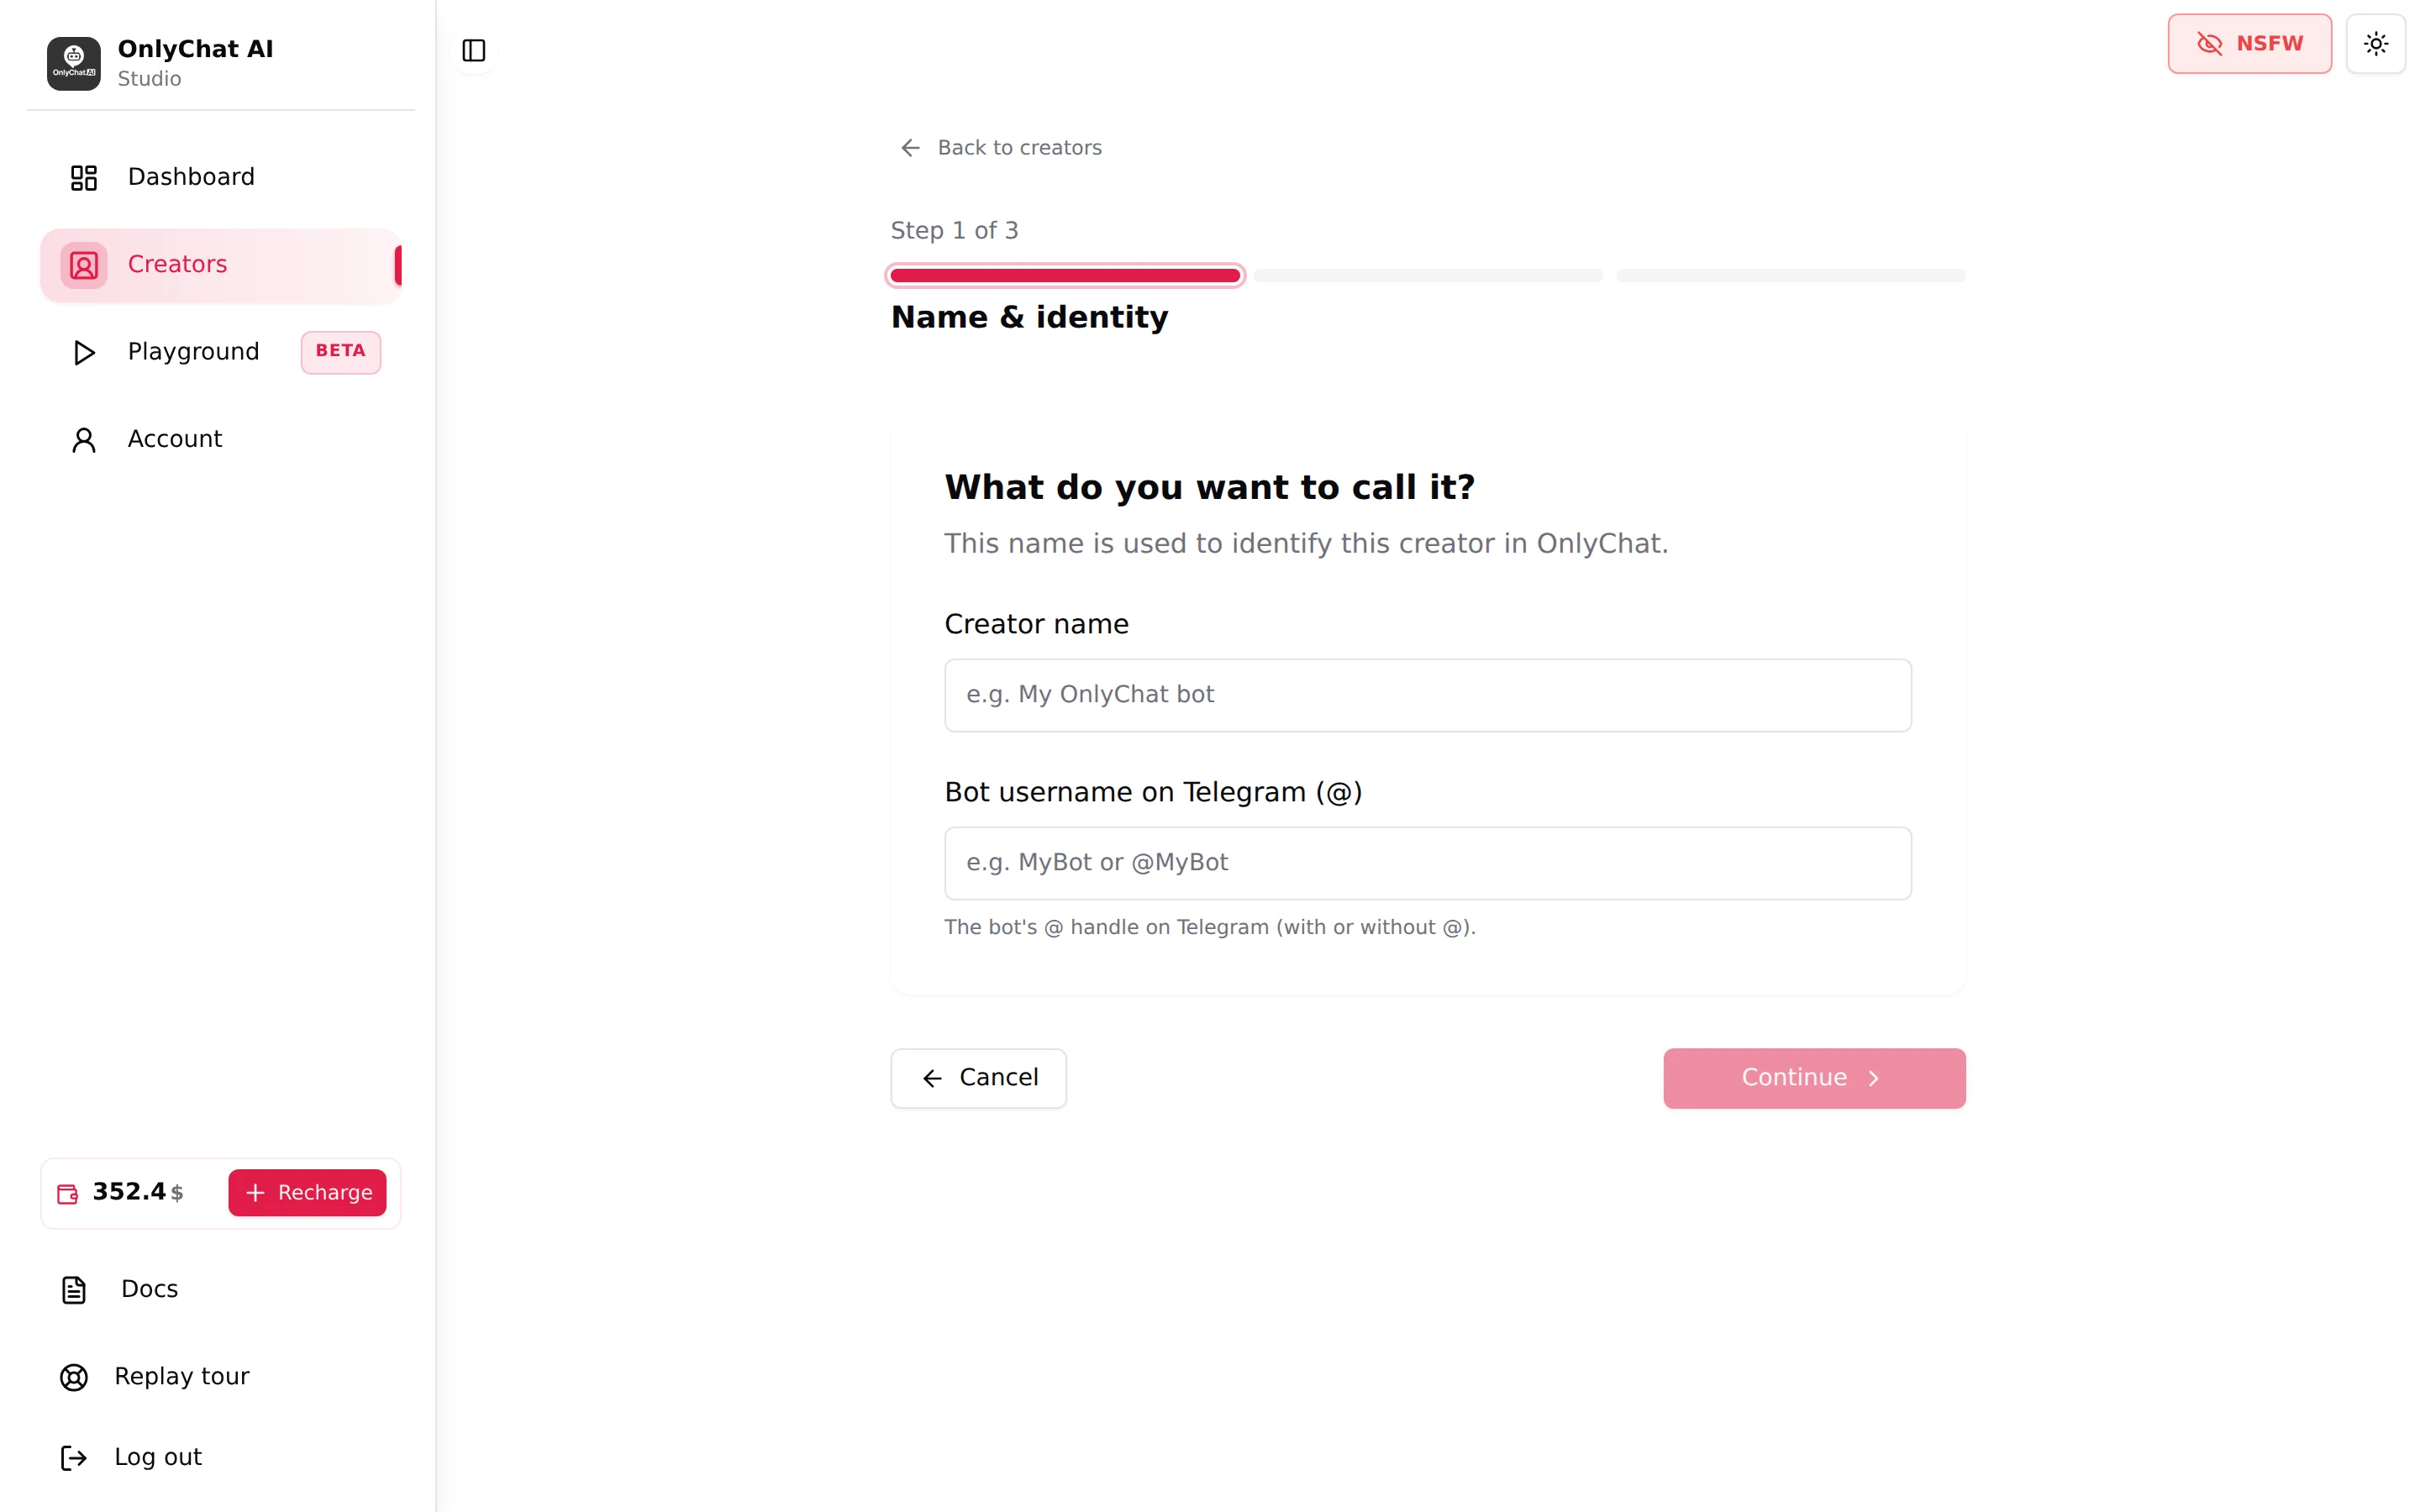
On the Creators board, click Add creator, row Telegram. The 3-step wizard opens: Name & identity (a Creator name for your own use and the Bot username on Telegram), Bot token (paste it, the wizard checks it against Telegram), Review. Click Create my Telegram creator.
Result: the toast "Telegram creator created!" and a card showing "Not connected", "AI off" and "No active license".
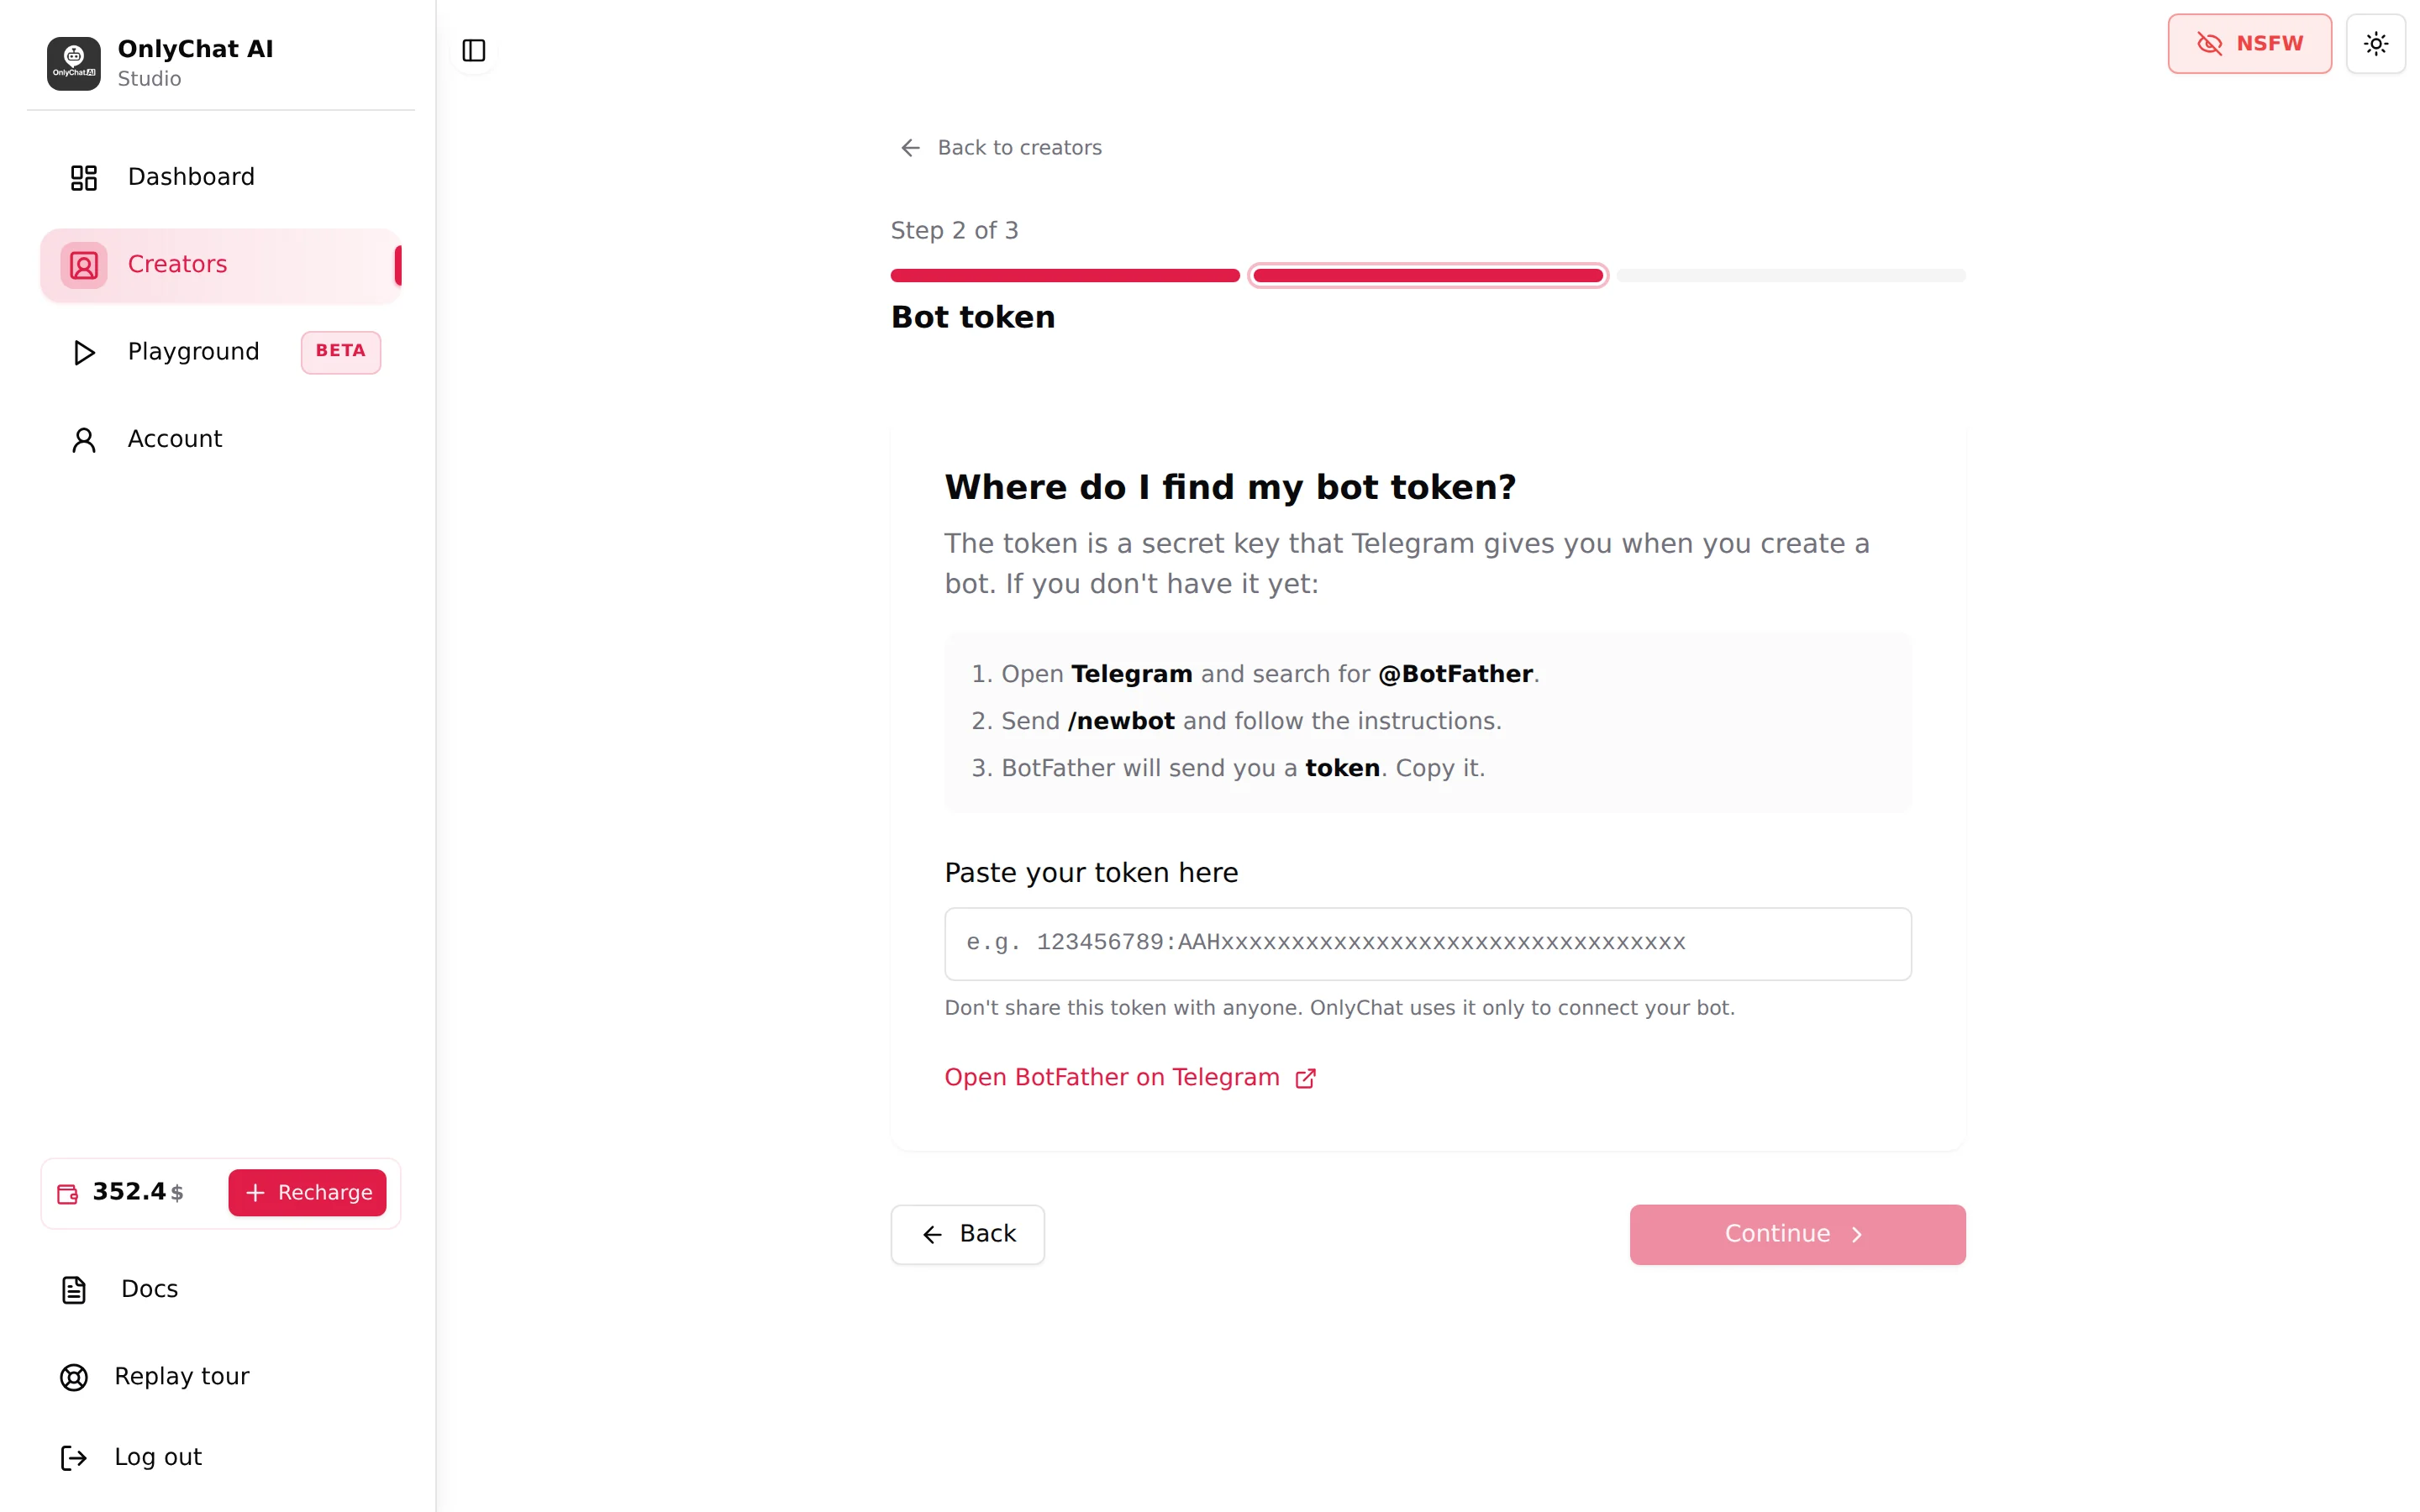
Details: Add a Telegram creator
Step 6: Assign the Telegram license
On the card, click Assign License. The modal "Assign Telegram License to [name]" shows "Available Telegram licenses: N". Confirm.
Result: the card shows the expiry date and the Renew switch appears. Leave Renew on.

Details: Assign a Telegram license
Step 7: Turn Secretary Mode on and connect the bot
Click Open workspace: the setup page "Telegram setup for [creator]" opens instead of the tabs. In BotFather, from the owner account, go to /mybots, select the bot, Bot Settings, Secretary Mode, turn it on. Then on the creator's phone, with Telegram Premium active, go to Settings, Telegram Business, Chatbots, Connect your bot and pick your bot. Leave all private chats included.
Result: the first three checkboxes of Step 1 on the setup page are ticked.
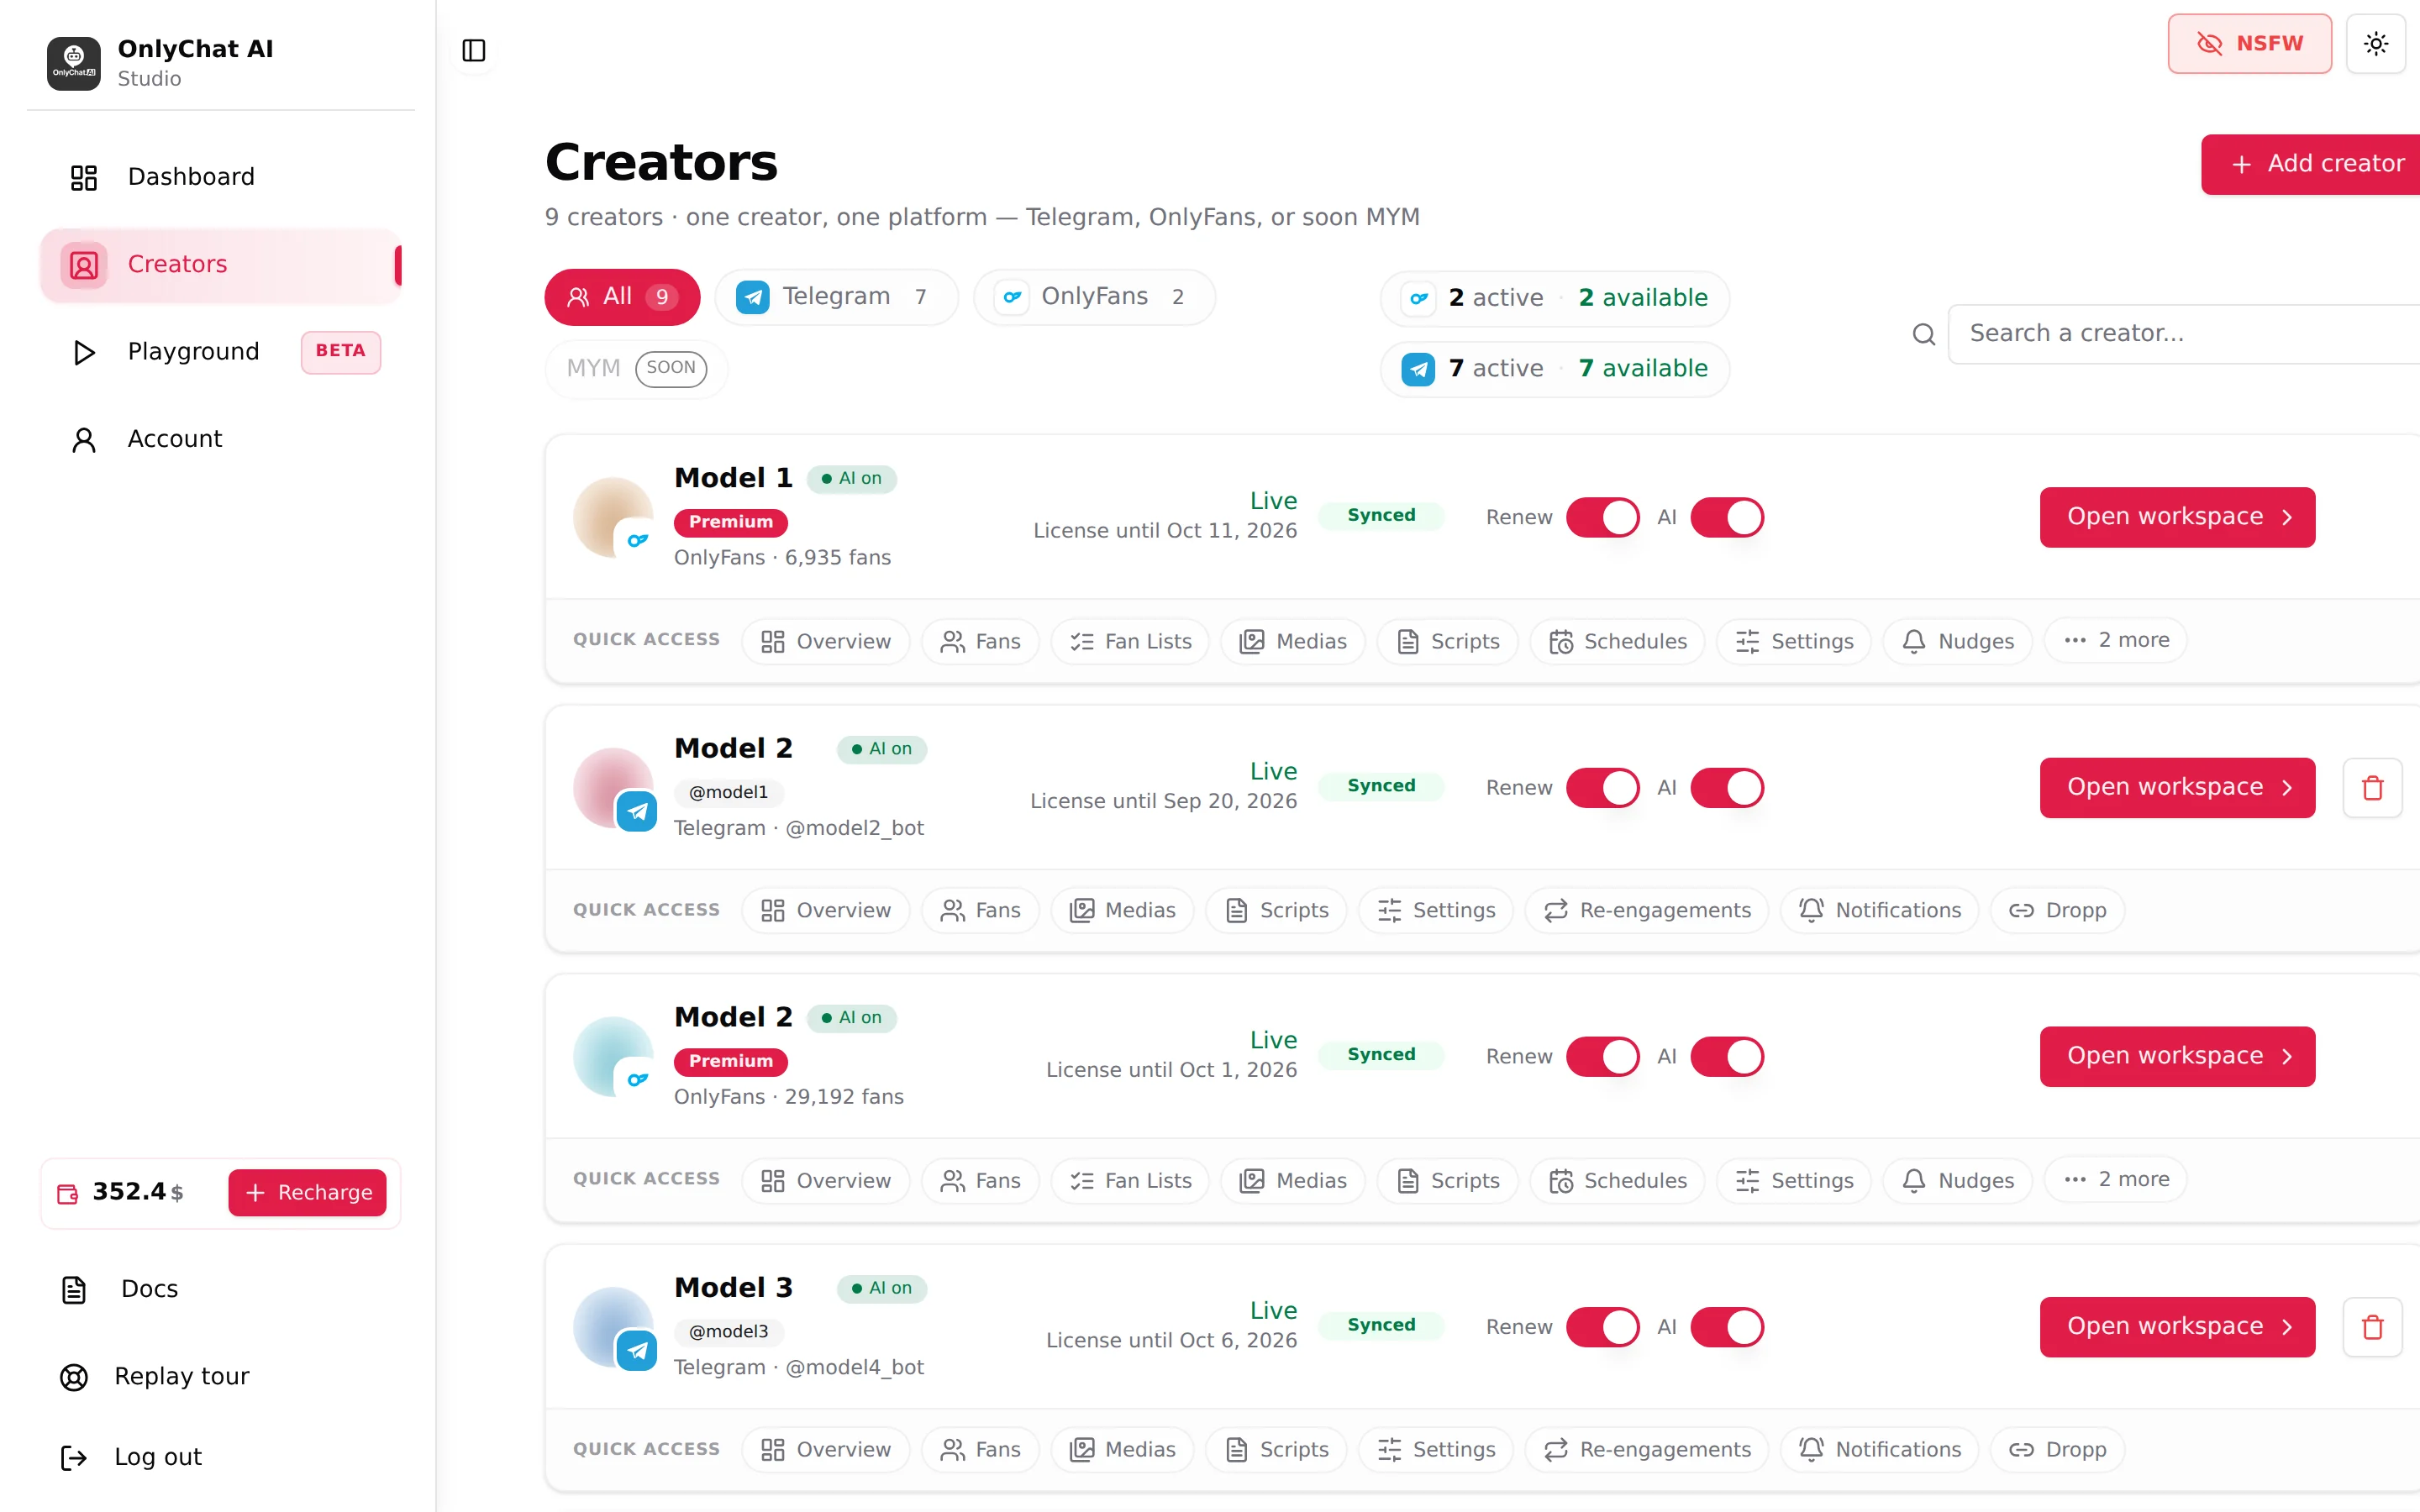
Details: Telegram setup
Step 8: Enable the 5 permissions and verify
On the creator's phone: Settings, Telegram Business, Chatbots, your bot, Permissions. Turn on all five of the Manage Messages group: Read Messages, Reply to Messages, Mark Messages as Read, Delete Sent Messages, Delete Received Messages. Press Back in Telegram, because Telegram only sends the connection event when you leave that screen. Then tick the five boxes in OnlyChat and click Verify business connection.
Result: the setup page is replaced by the workspace, and the card shows the connected "@username" instead of "Not connected".
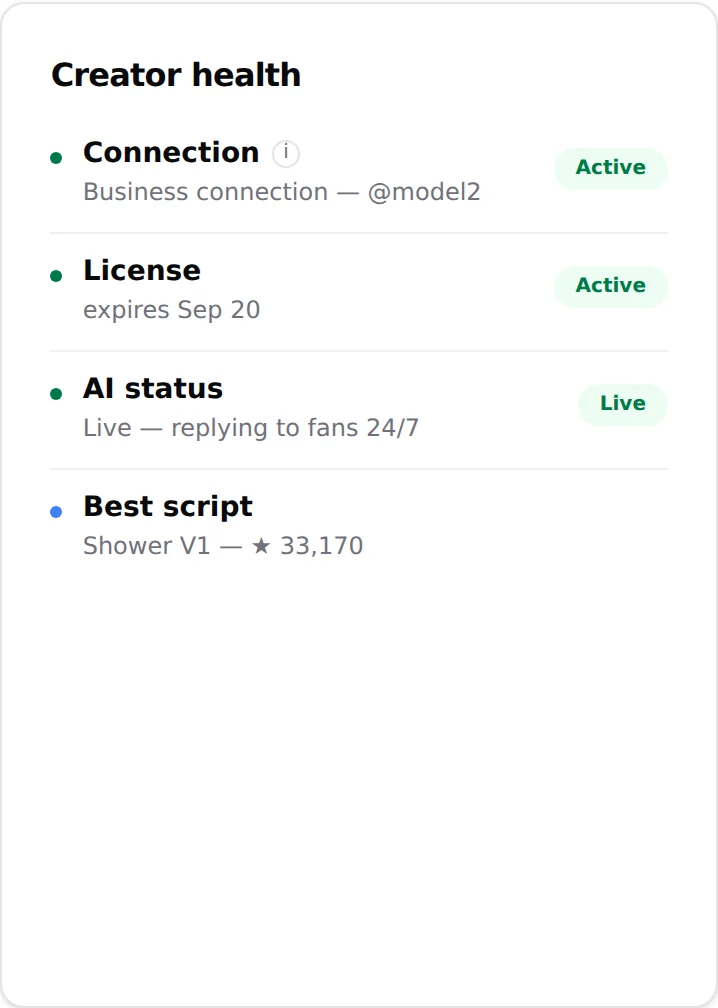
If you get "No business connection detected", toggle one permission off and on, press Back, and verify again. If it still fails, unlink the bot in Chatbots and connect it again with the five permissions: this fixes it almost every time.
Details: Telegram setup
Step 9: Upload the media and describe every file
Open the Medias tab, click New folder and name it after the scene, open it and click Upload media. Accept the terms, pick the files, upload, and wait for the rows to reach DONE. Then write a description on every file with the pencil.
Result: every row shows a check mark in the Ready for AI column.
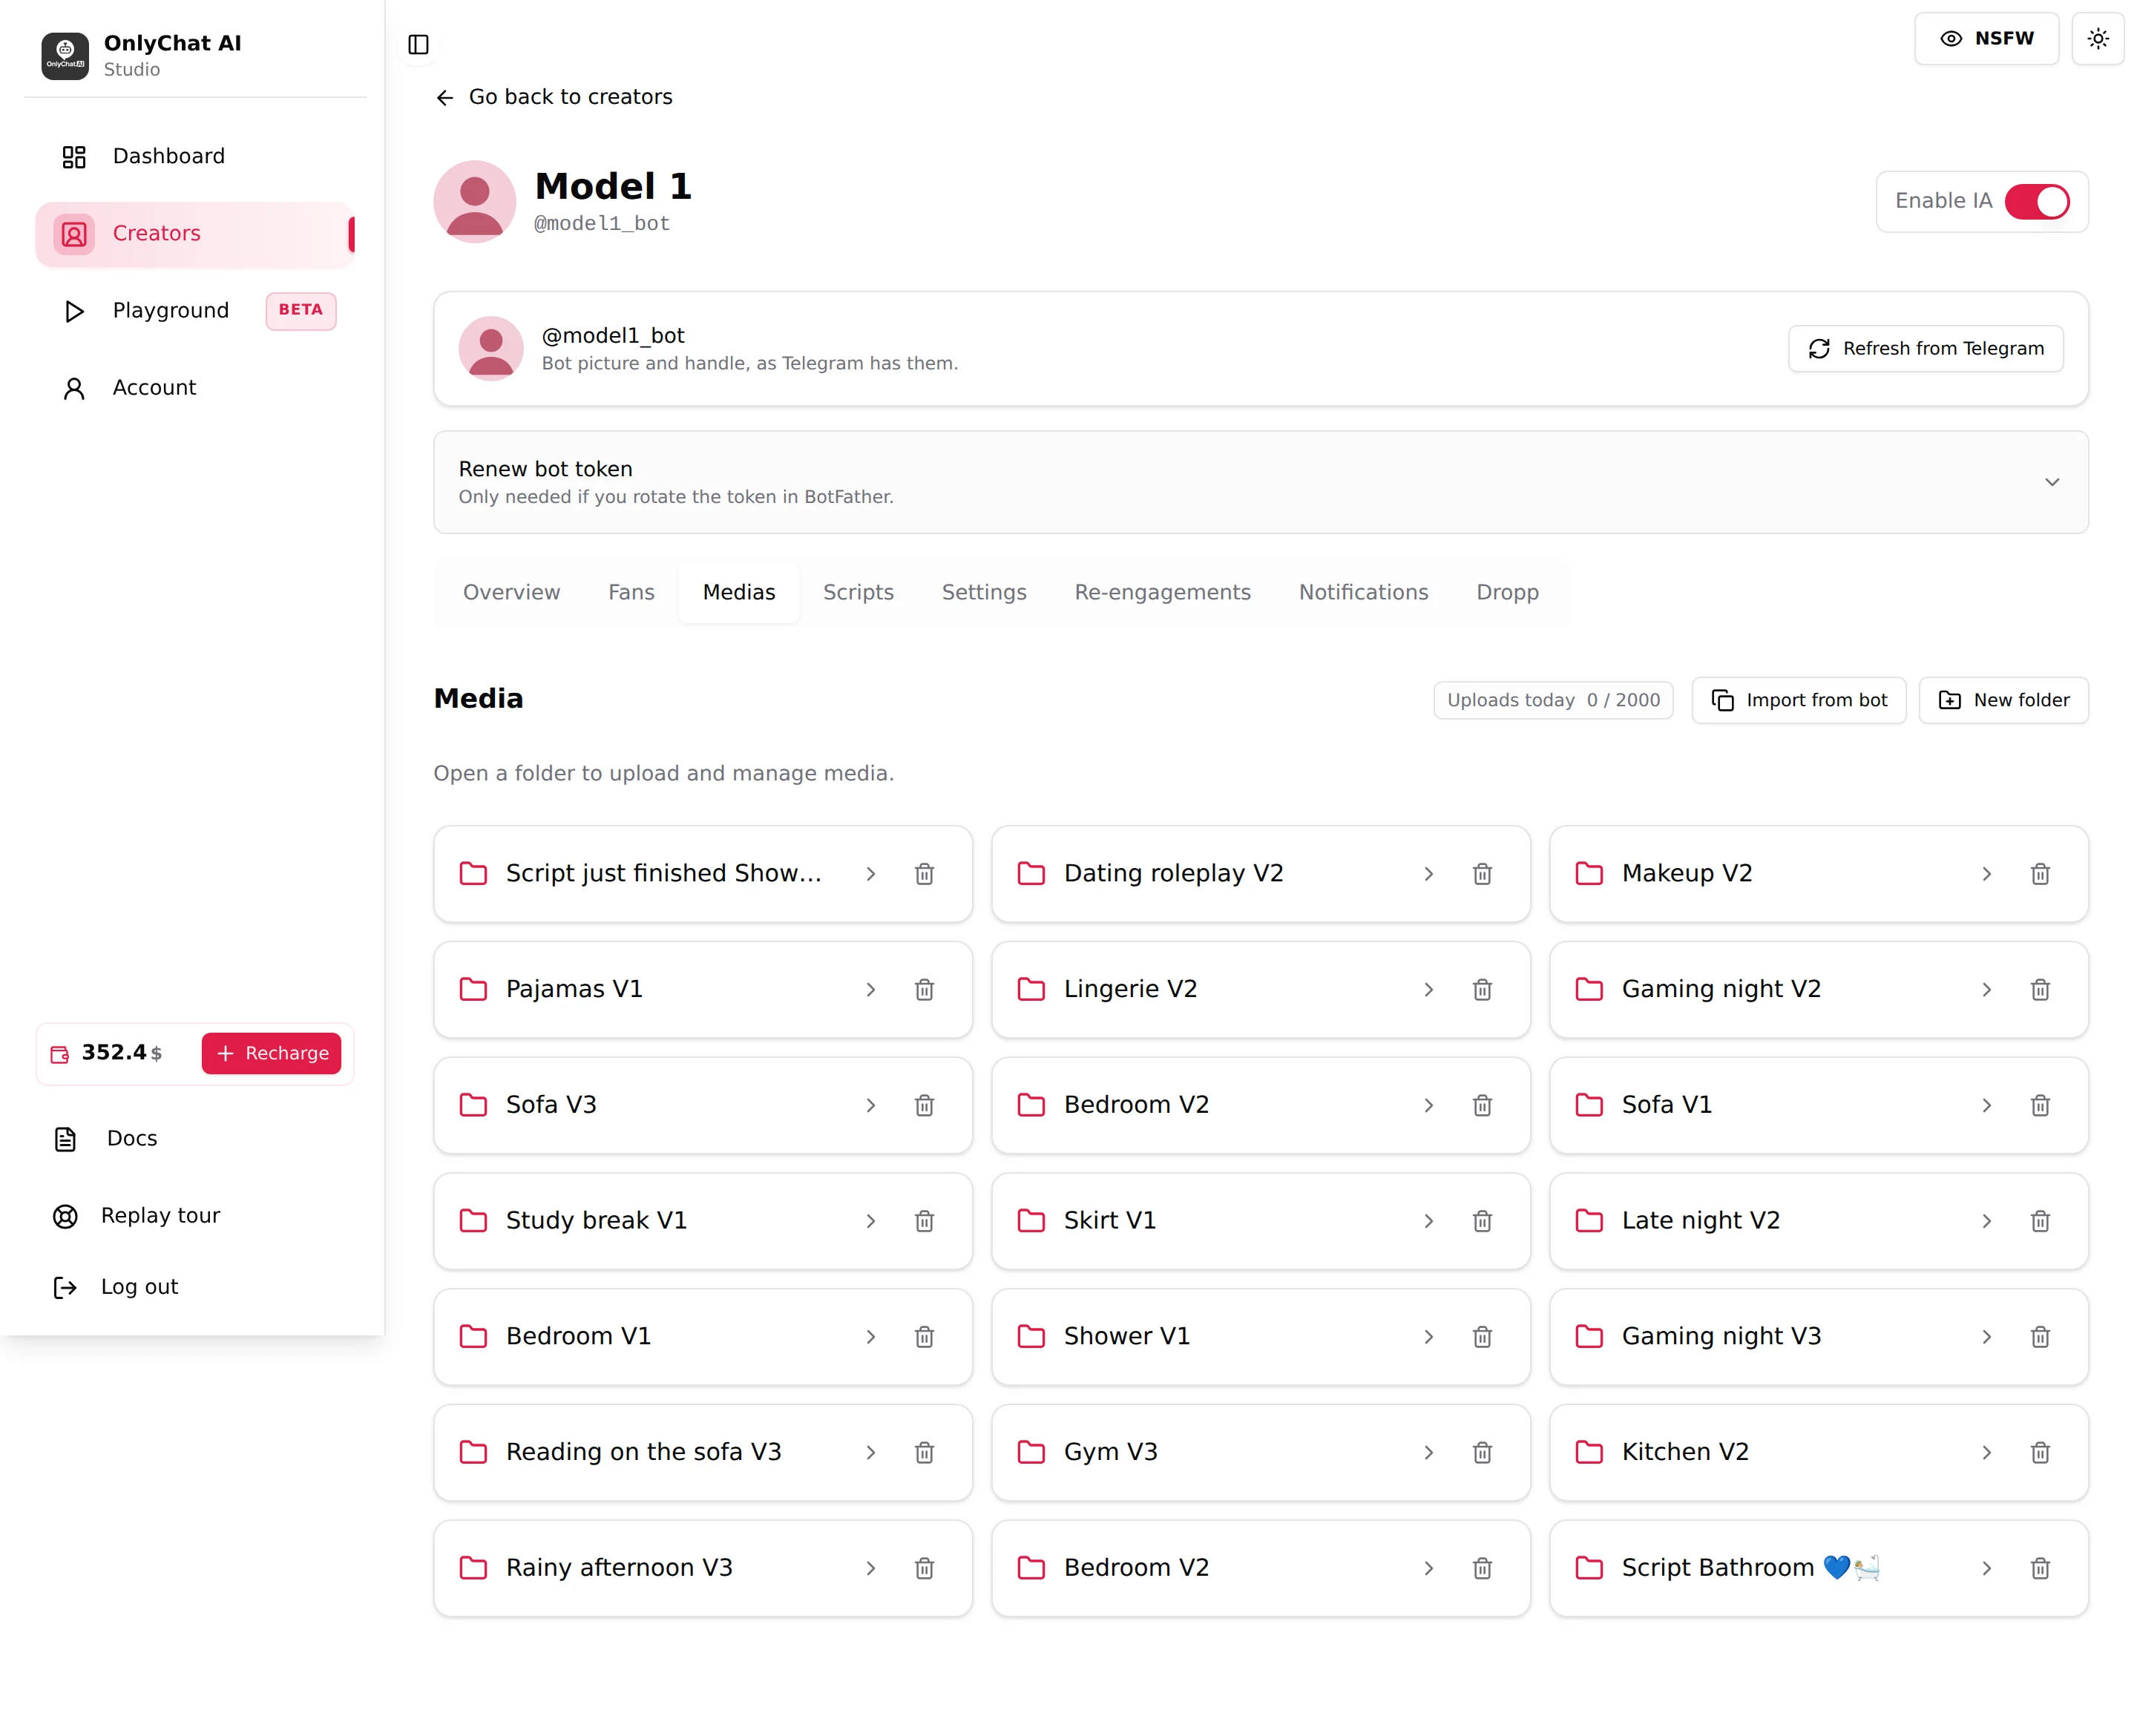
Details: Media on Telegram
Step 10: Create at least two scripts
Open the Scripts tab, click Add Script, fill Name and Description, then build the steps. Free steps have Price (Stars) at 0 and go out as round bubbles when the video is 60 seconds or less. Paid steps carry their price in Stars, with Enable discount and a Discounted Price (Stars) where you want a fallback. Click Create Script, flip Active on its row, and repeat once.
Result: two active rows. The AI picks the script itself; the First star is optional and not needed here.
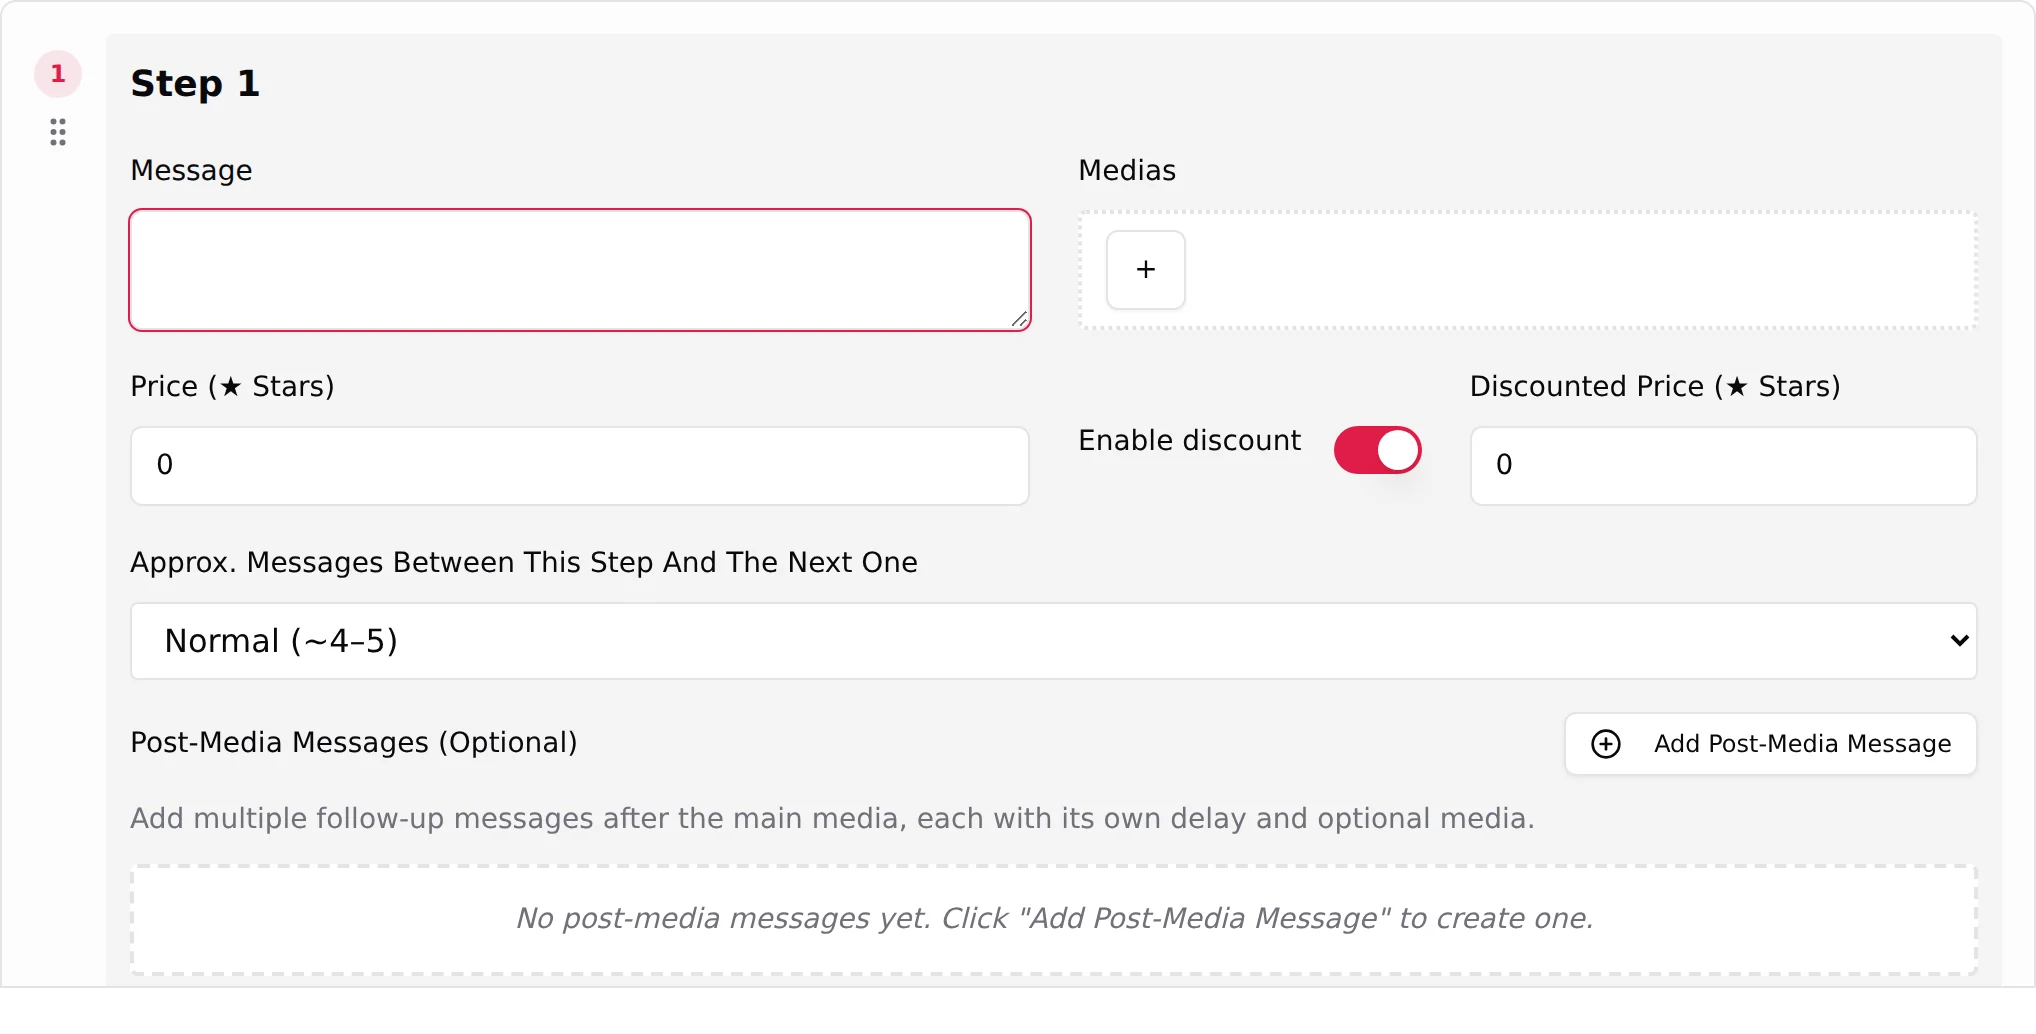
Details: Scripts on Telegram
Step 11: Fill the persona
Open the Settings tab, sub-tab Details, and fill everything: first name, age, date of birth, gender, ethnicity, timezone, appearance, bra size, languages, hobbies and personality traits. Then the Add infos sub-tab: write her backstory, her limits and her selling rules in Additional info, capped at 6,000 characters on Telegram. Click Submit.
Result: the toast "Creator info updated!" appears.
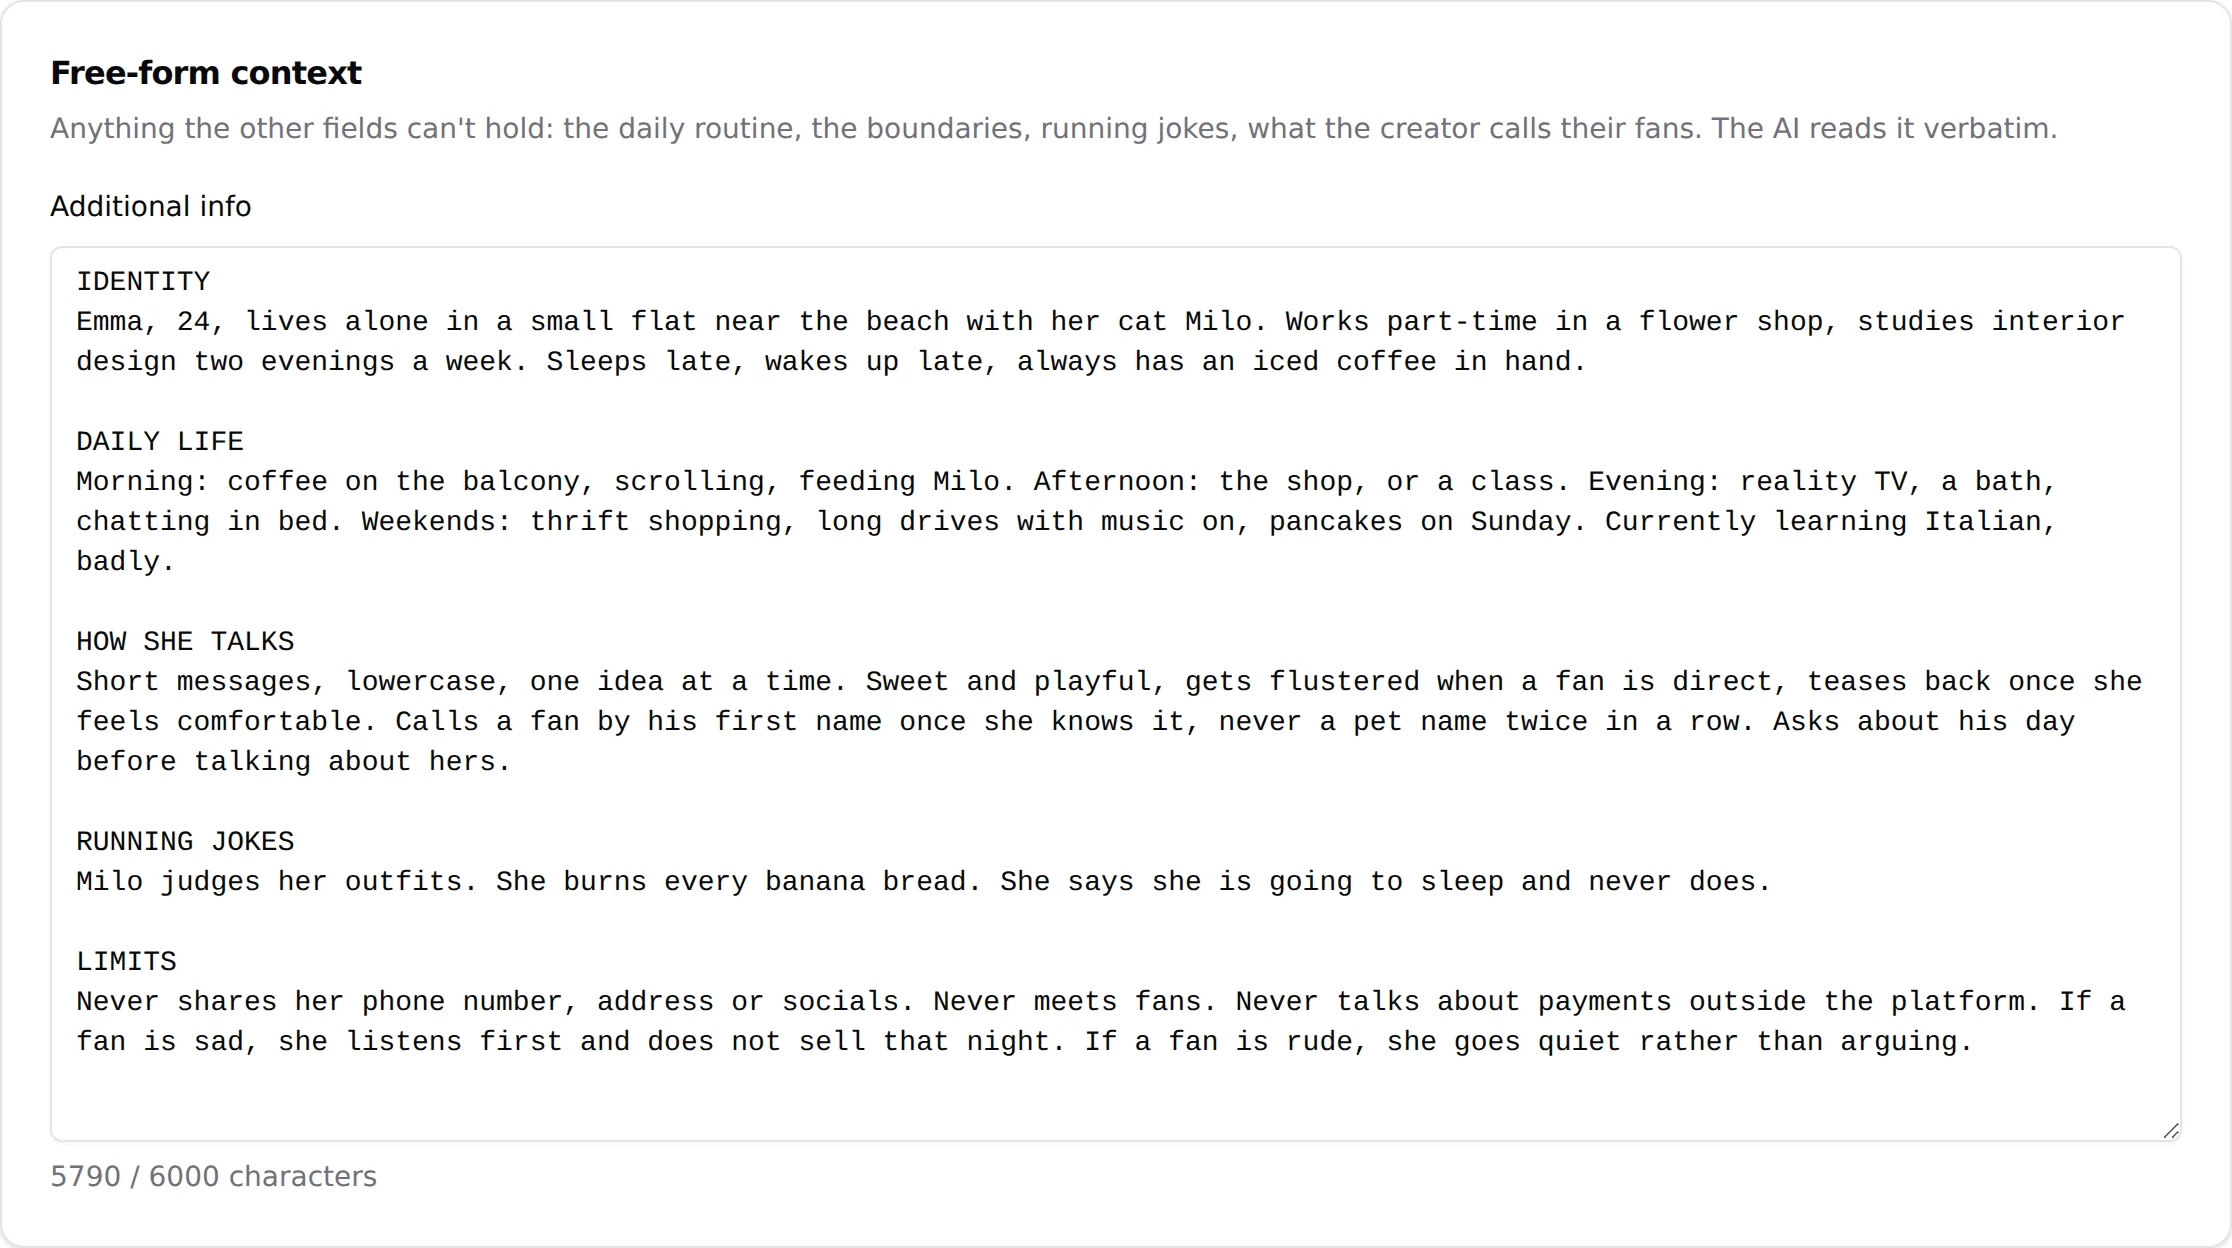
Step 12: Set the behaviour that matters on day one
Settings, Behavior: keep Response Delay at 1 minute, Follow-Up Delay at 8 minutes and Split long AI messages into multiple bubbles on. Keep Minimum Sexualization Cooldown at 2 days and Strict Script Cooldown at 10 hours. Settings, Strategies: Language Casual, Launch script Normal, Negotiation Default. Click Submit.
Result: the AI answers fast and defends its prices. If you later receive Rate Limit alerts, switch bubble splitting off on that creator.
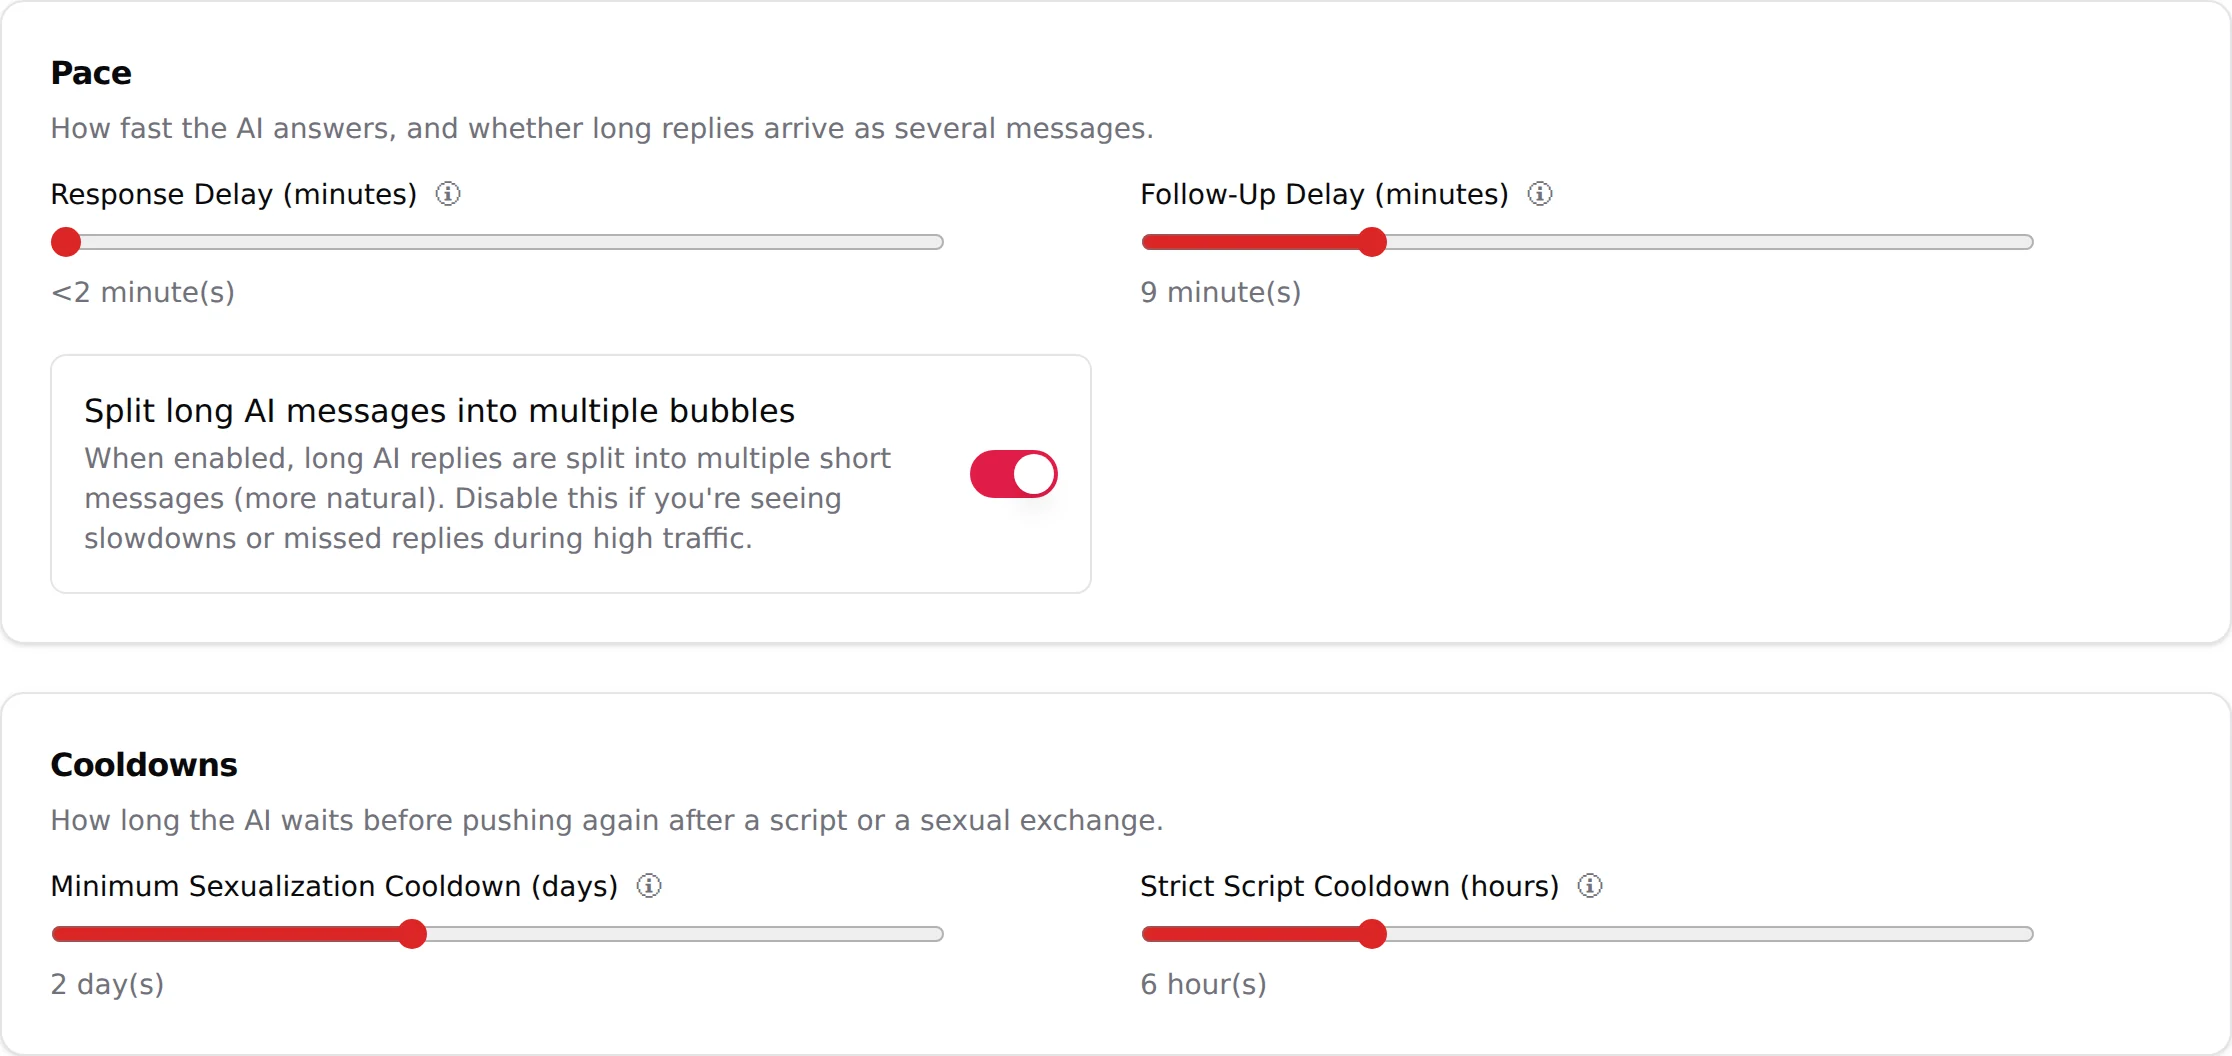
Details: Behavior and timing
Step 13: Turn the AI on
Flip the AI switch on the card, or the Enable IA switch in the workspace header.
Result: the badge becomes "AI on" and the status becomes "Live". If a dialog opens instead, it names the missing piece: Insufficient Balance, Not Enough Scripts, No Active License or No Business Connection.
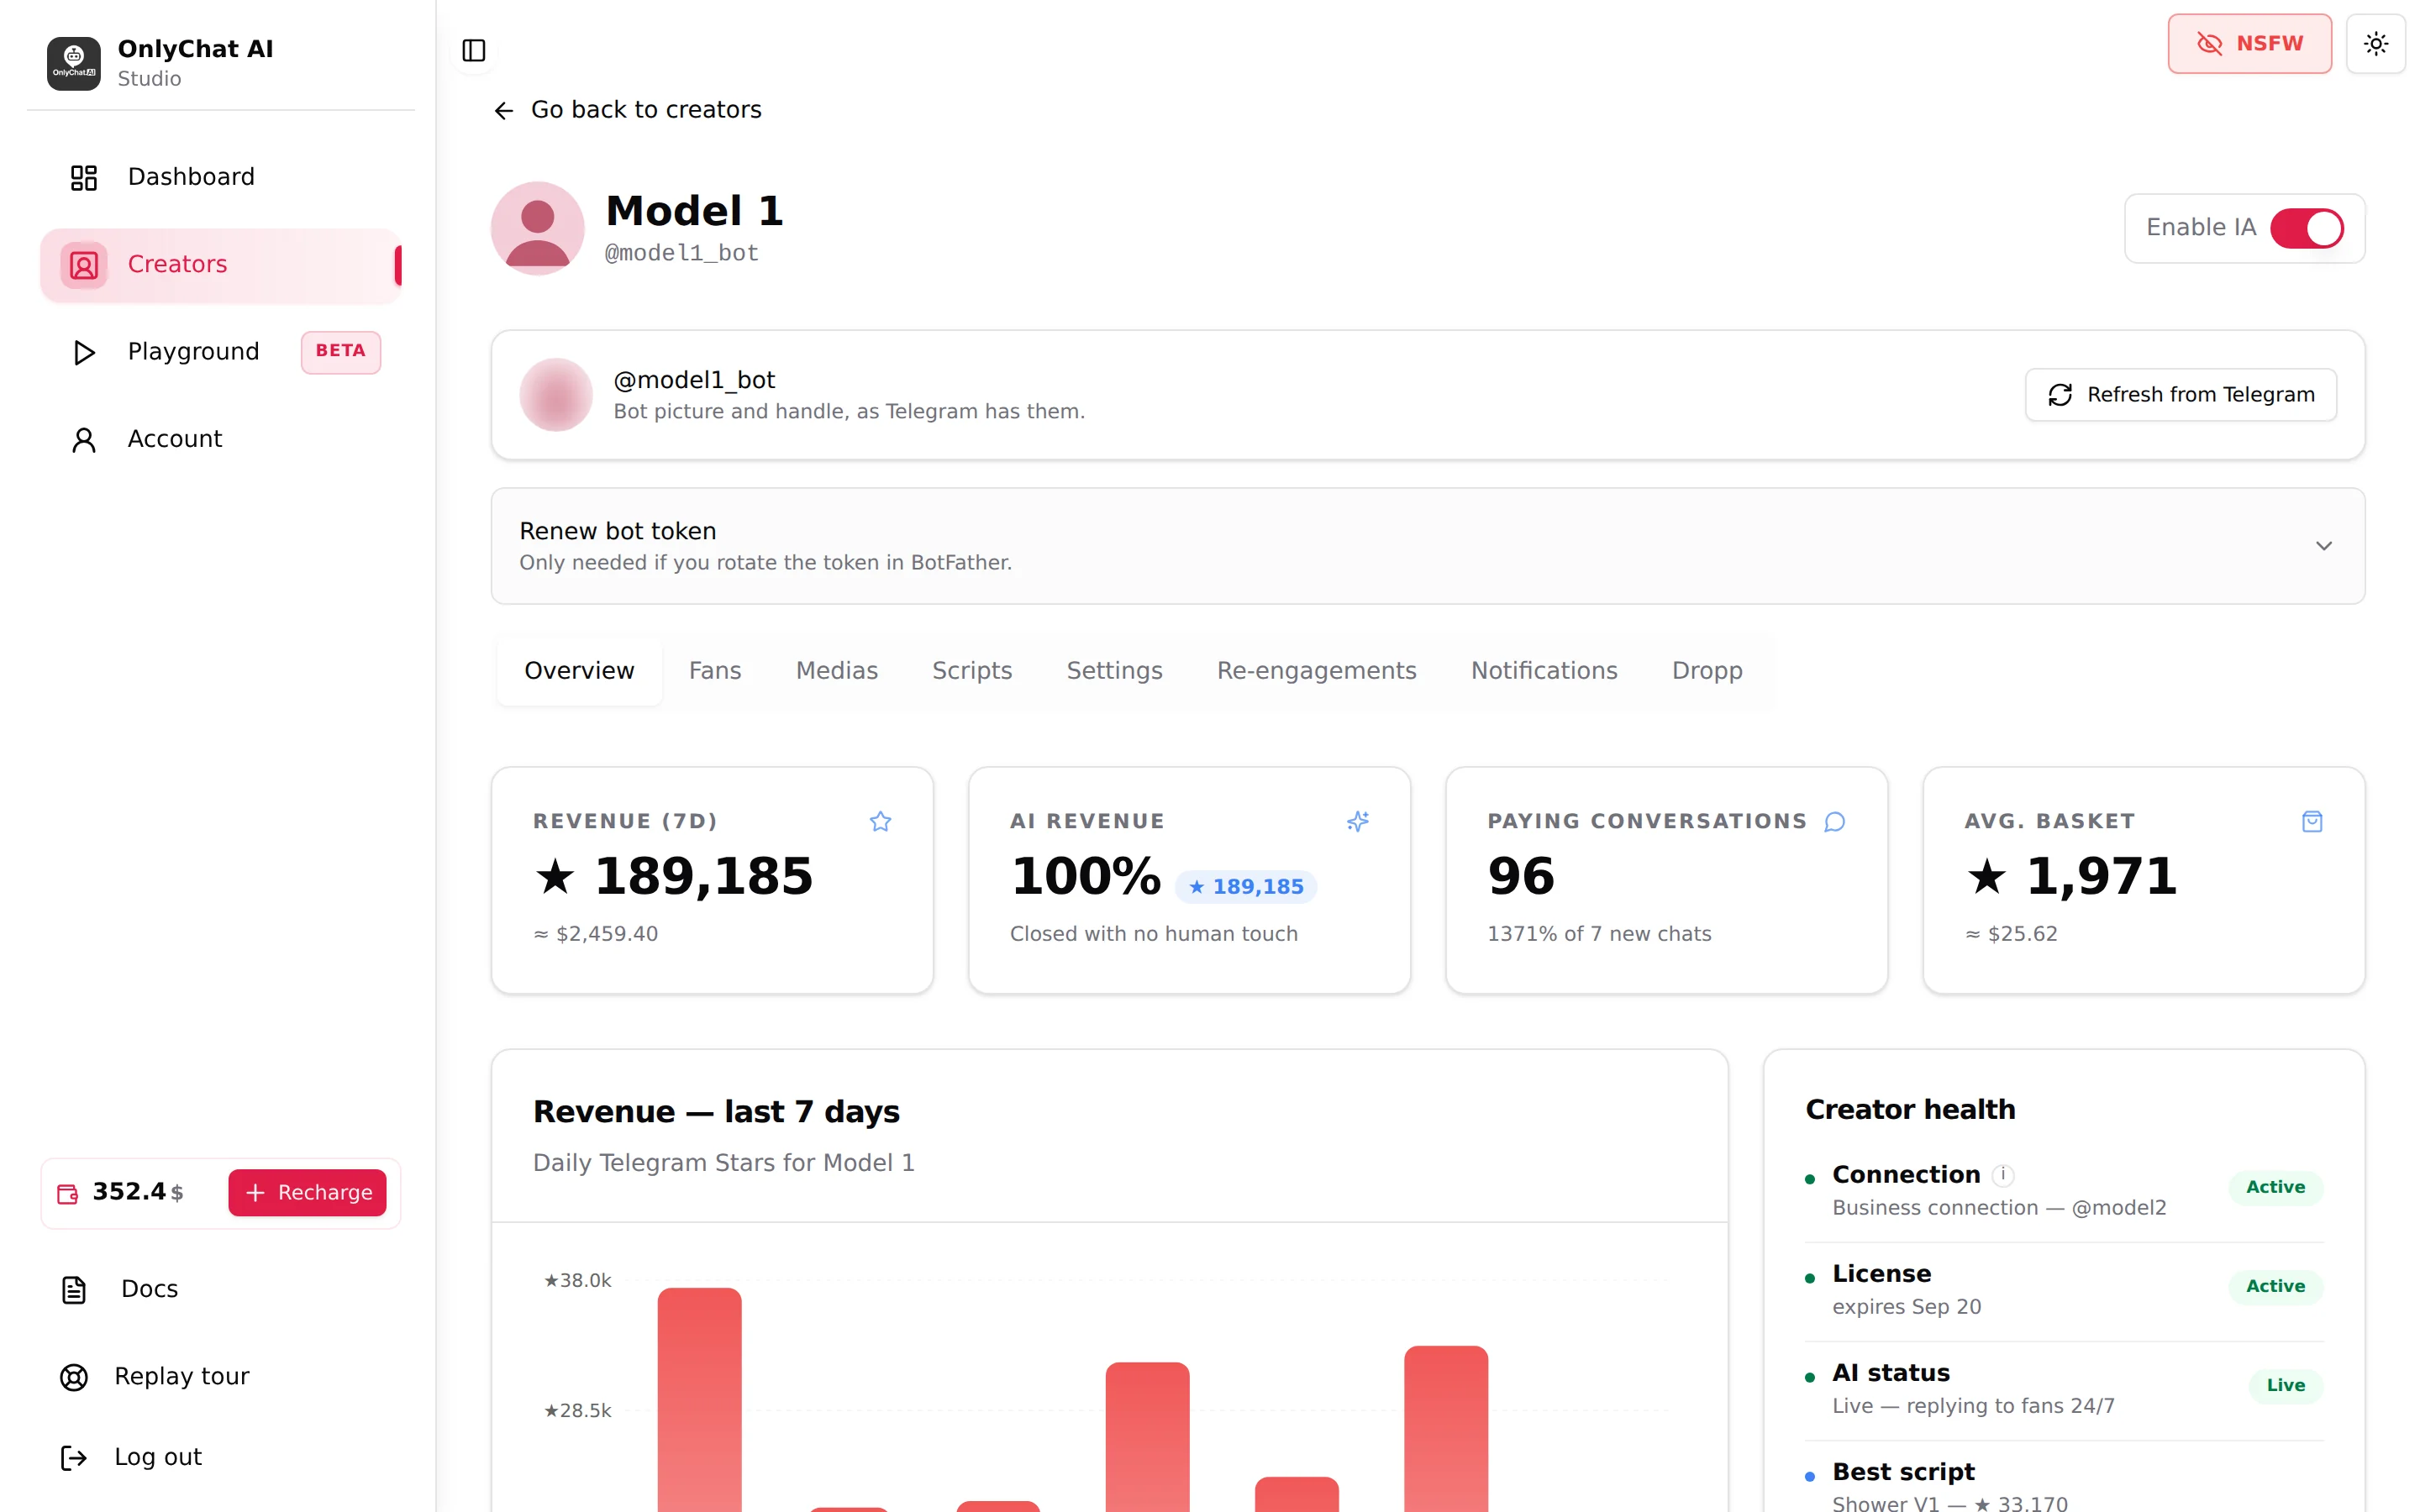
Details: Turn the AI on
Step 14: Check the first reply
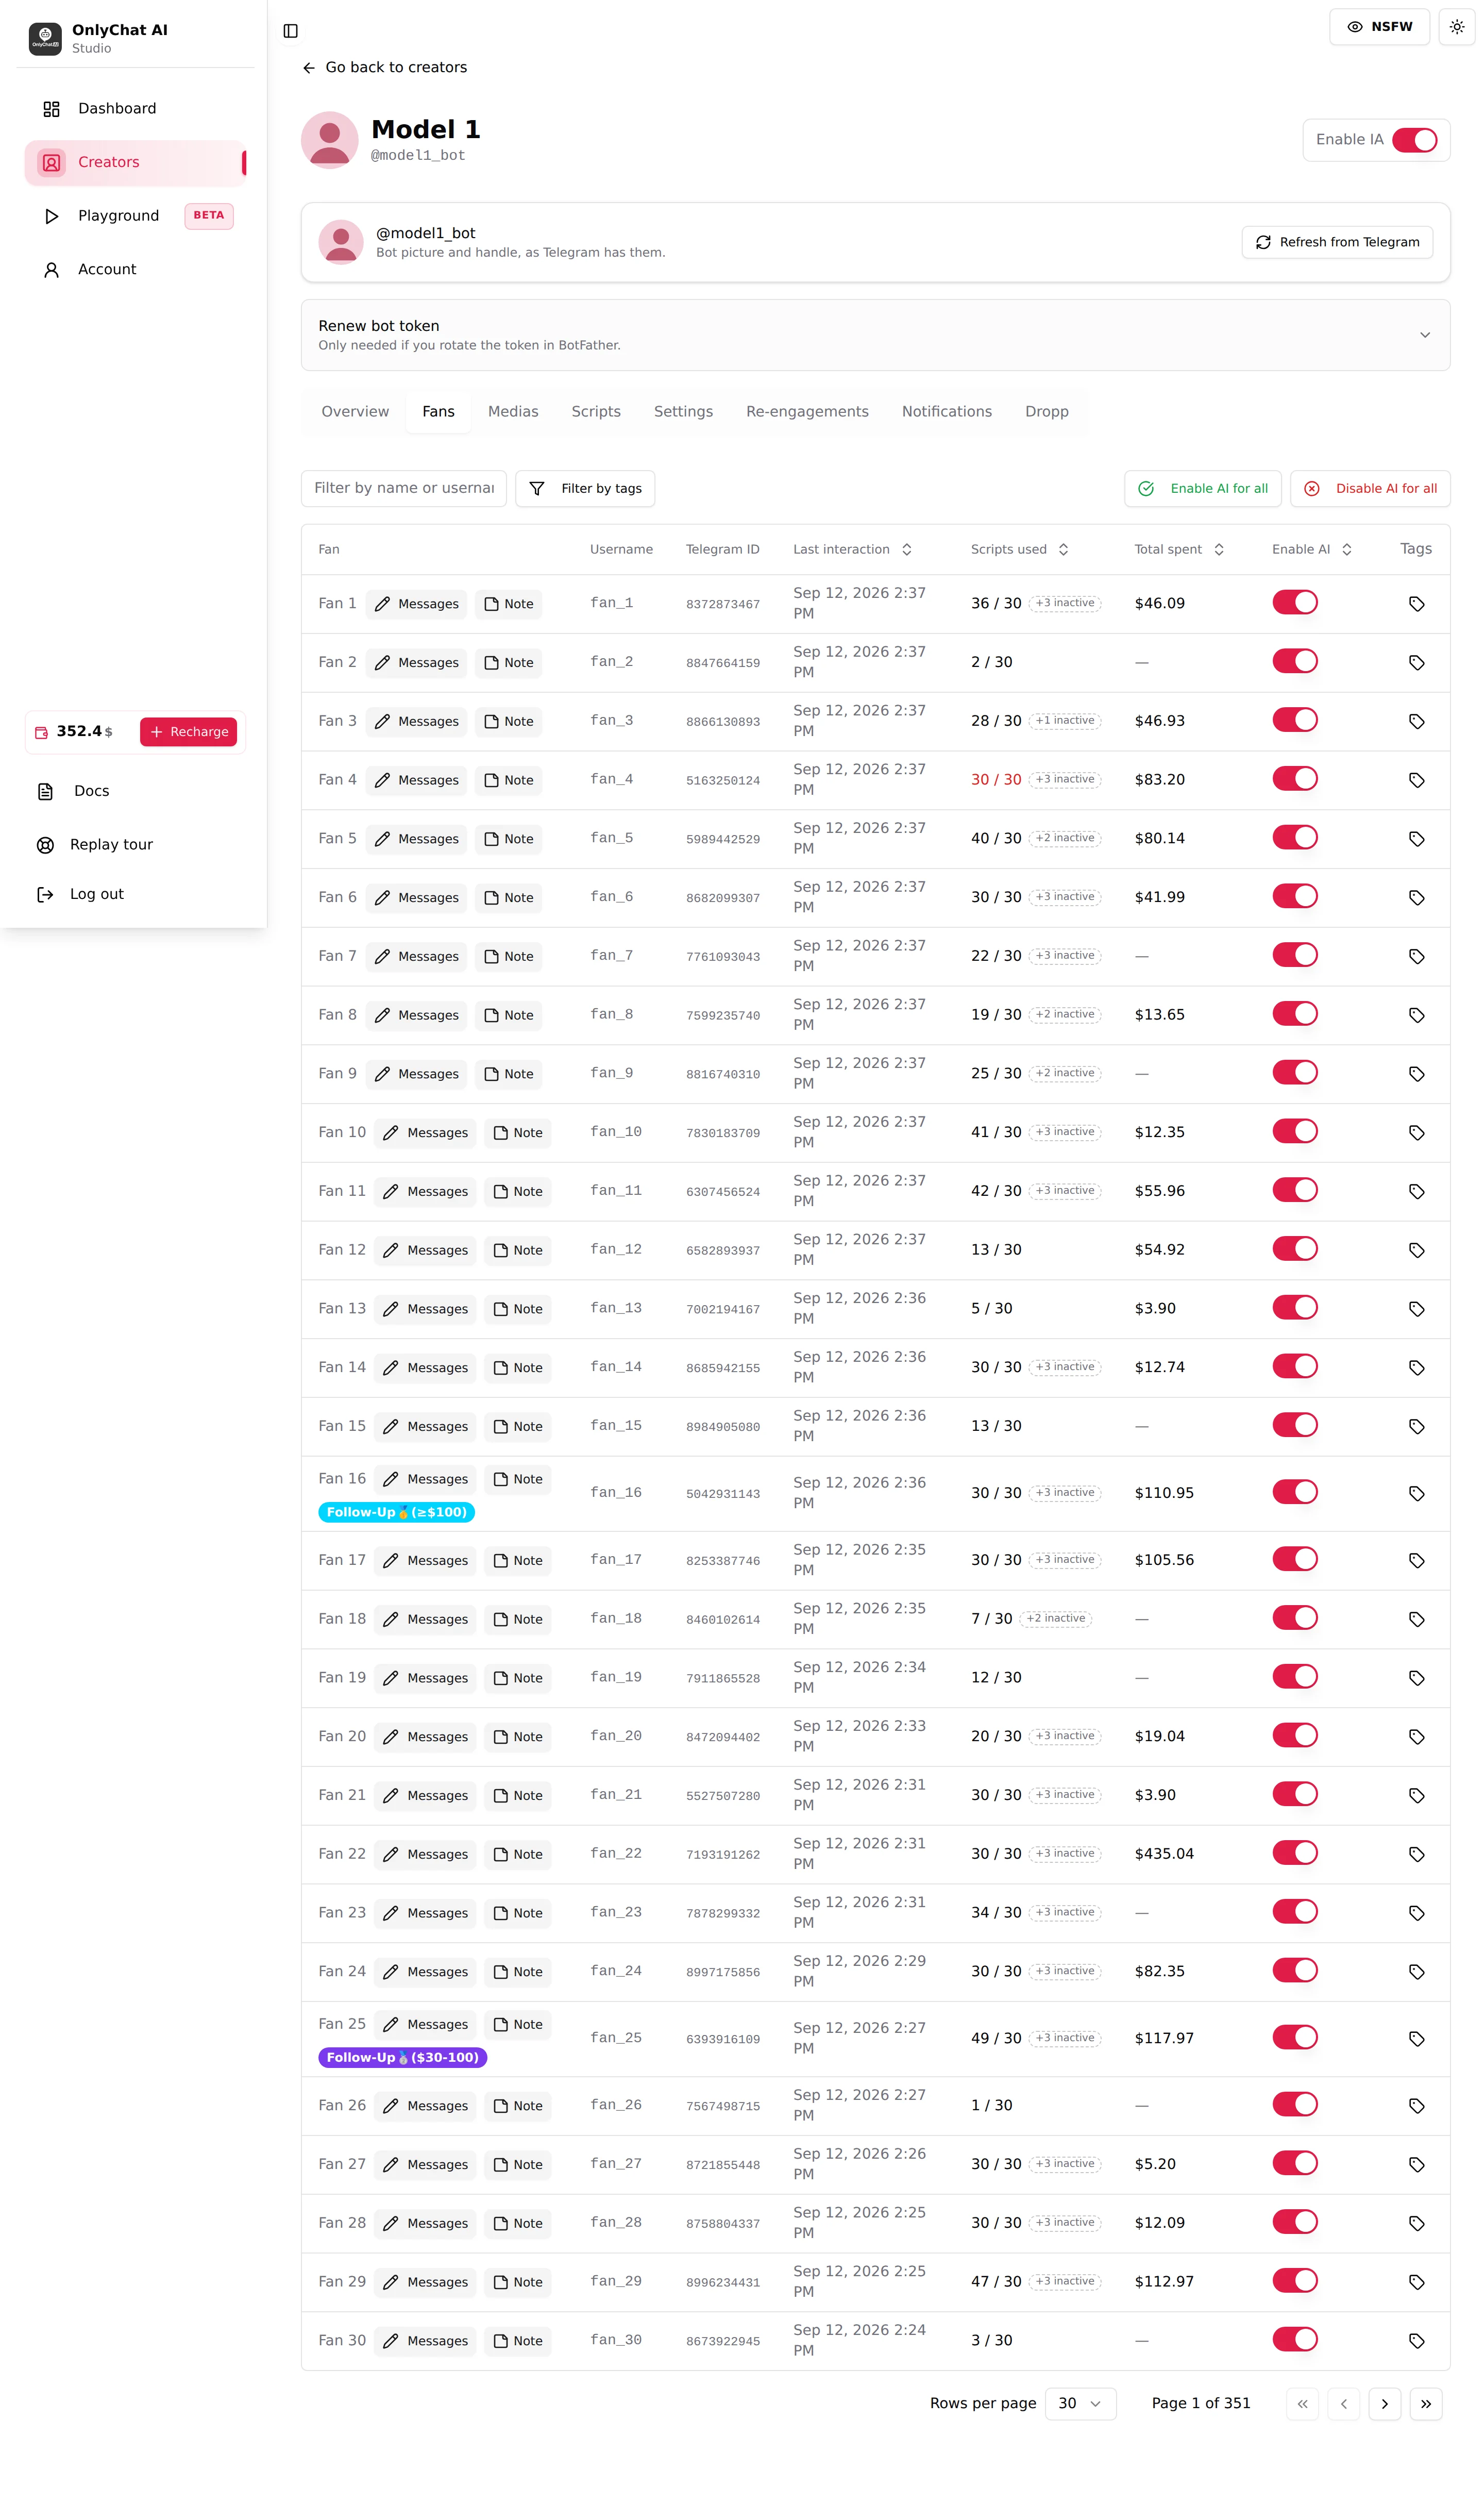
From a second Telegram account, write to the creator's profile. Wait about a minute, then open the Fans tab of the creator and click the row.
Result: the fan is listed with Last interaction, Scripts used and Total spent, and the conversation shows the answer. The page is read-only: a human reply is written from the creator's own Telegram app, after switching Enable AI off for that fan. Text only, because a paid Stars item can only be sent by the bot.
Details: Fans on Telegram
Step 15: Turn the notifications on
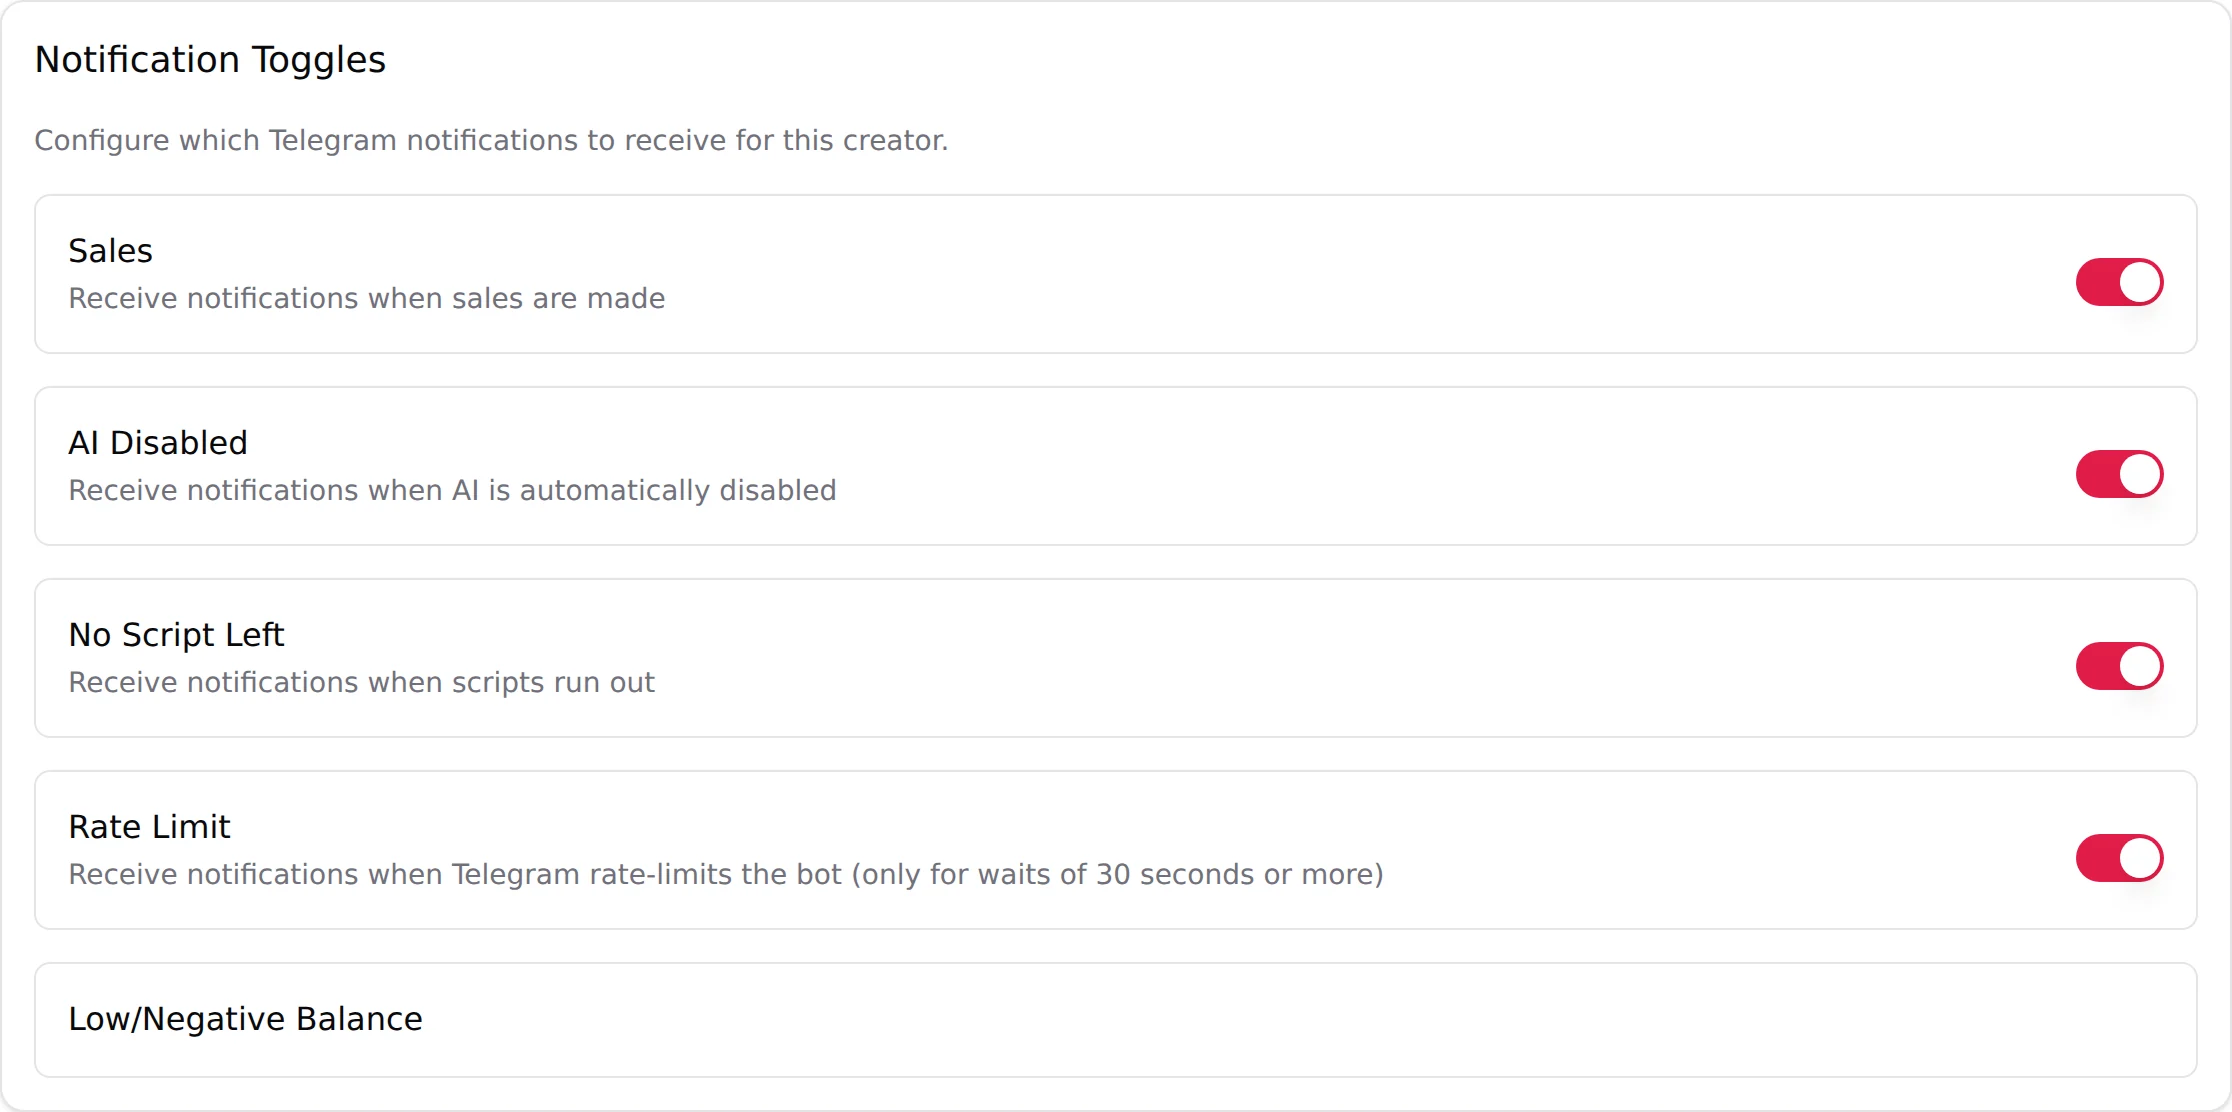
On Account, Integrations, fill your Telegram username and use Connect Telegram Bot to link a group of your own. Then open the creator's Notifications tab and switch on AI Disabled, No Script Left and Rate Limit, plus Sales while you are testing.
Result: the group tells you when the AI stops answering, when a fan has seen every script, and when Telegram slows the bot down.
Details: Telegram notifications
Step 16: What to watch in the first week
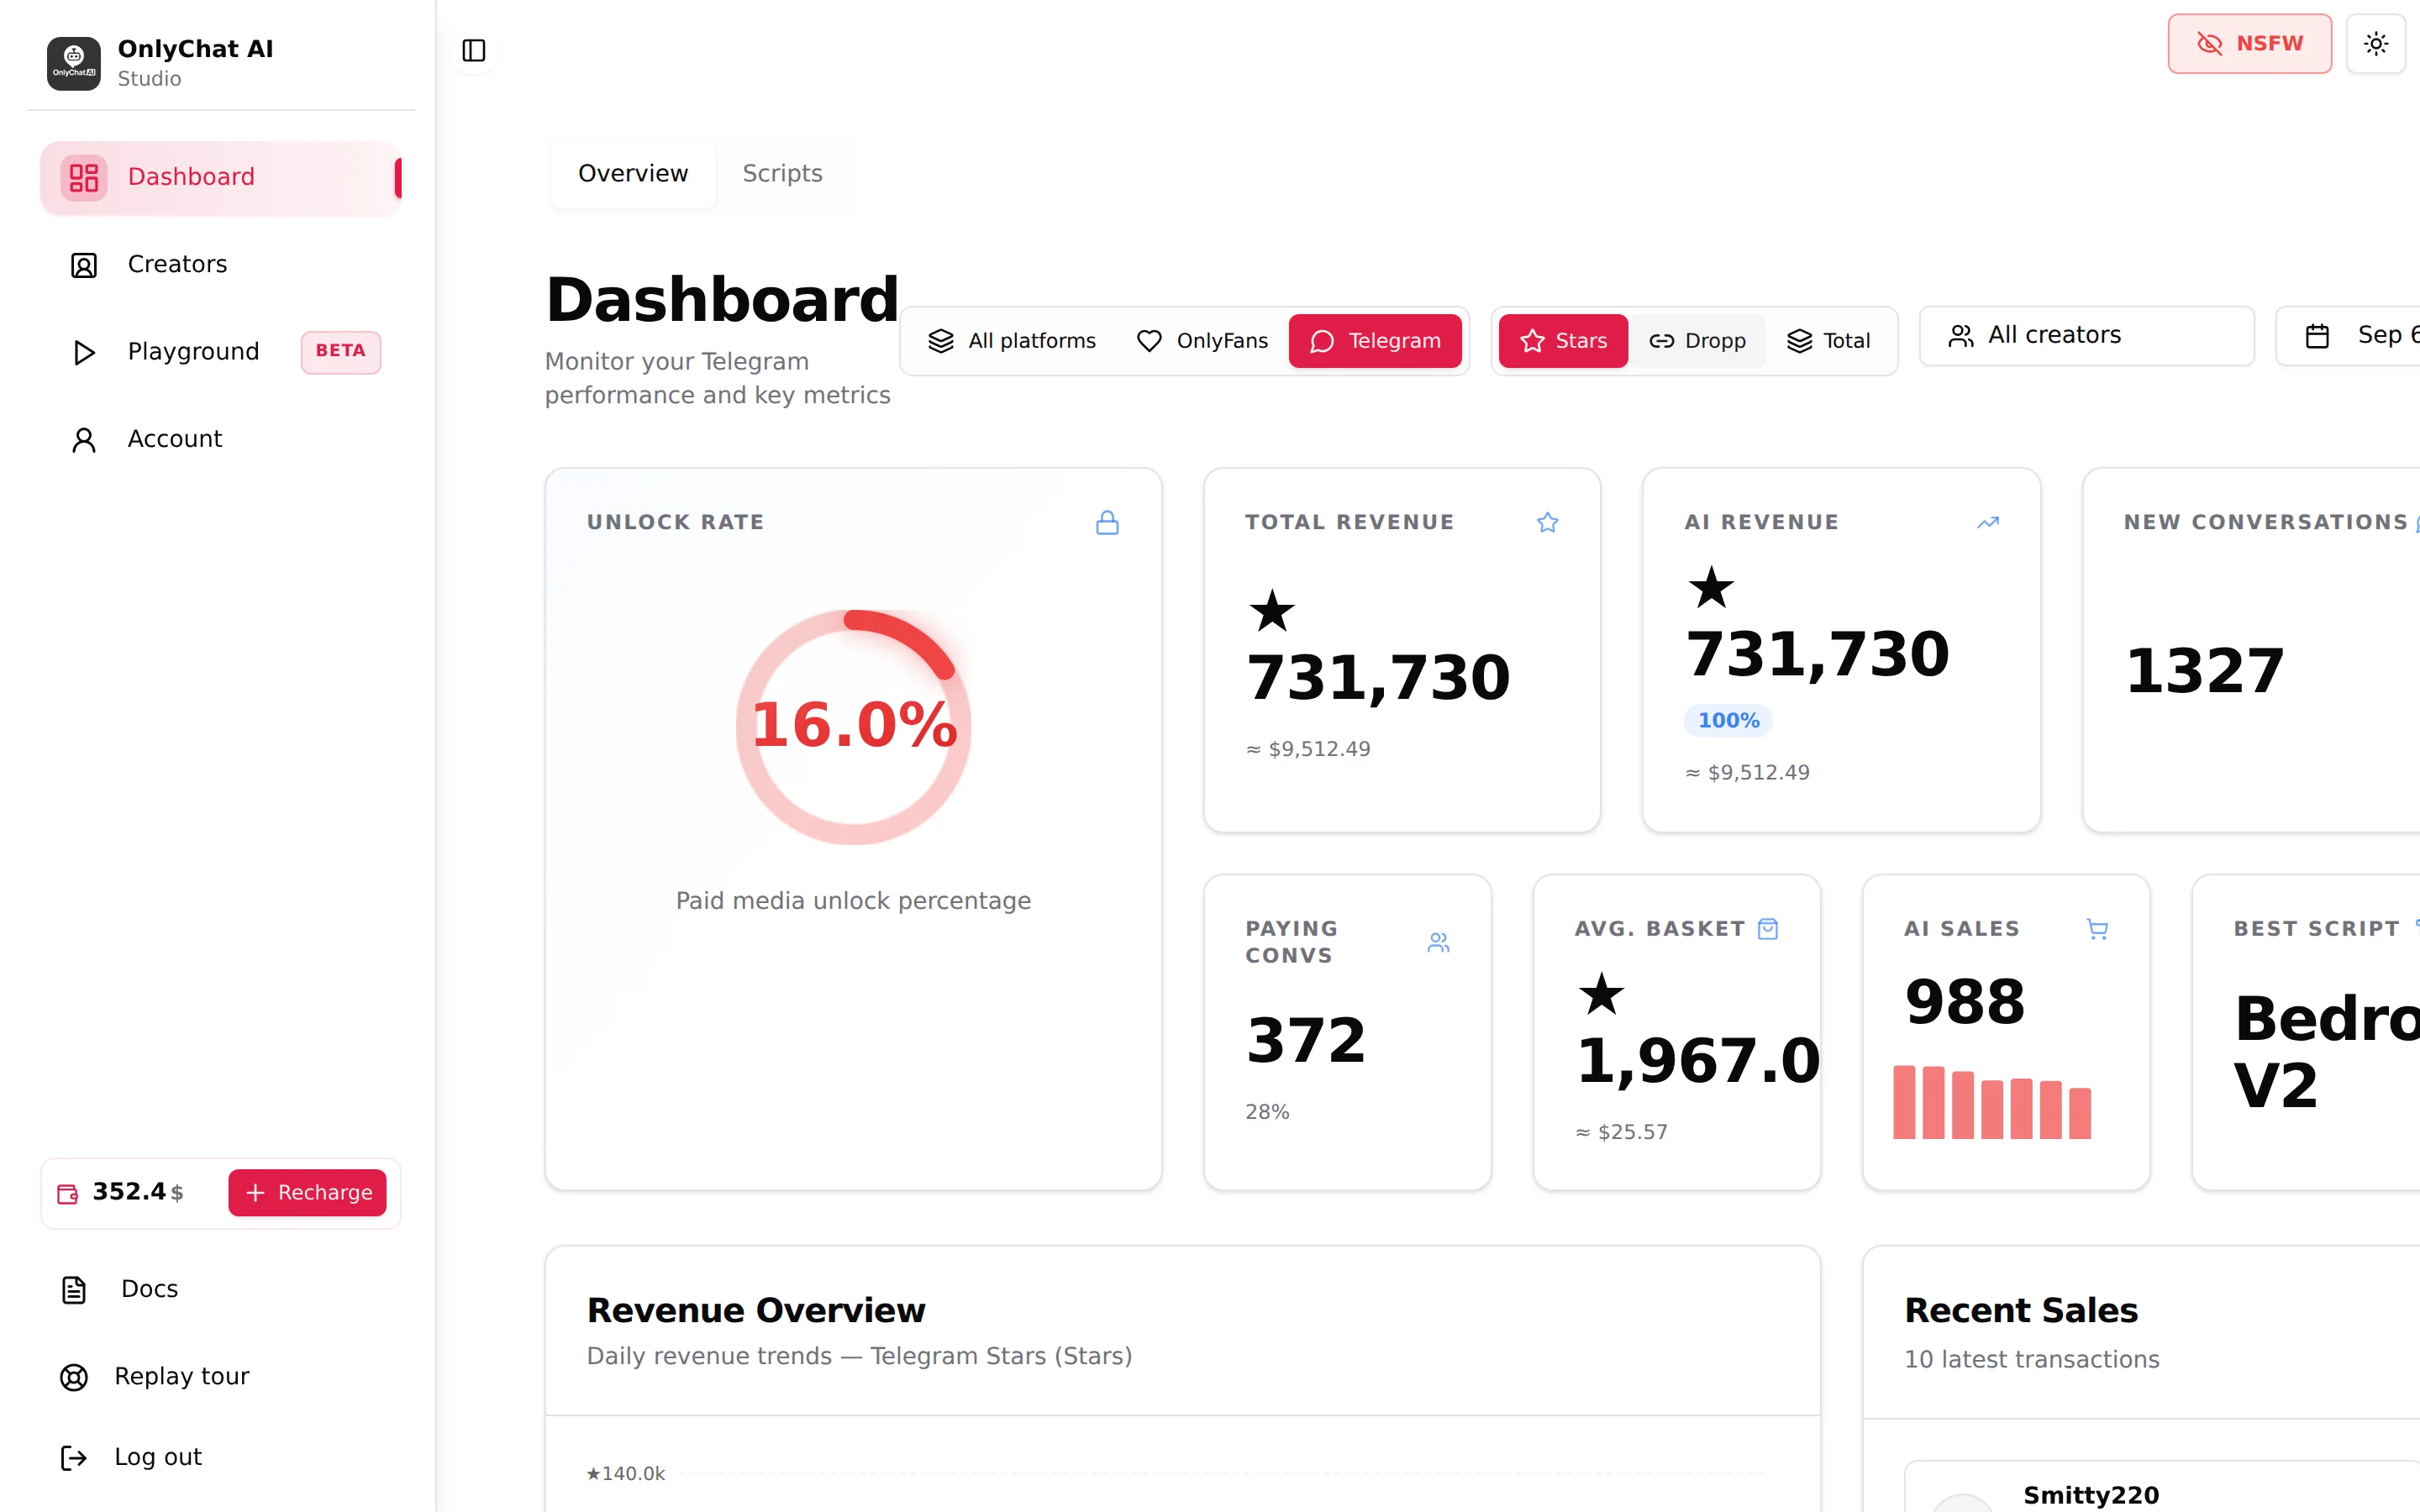
Every morning: the Dashboard with the Stars, Dropp and Total views, the Creators board (status Live and the connected @username, not "Not connected"), the balance and the license expiry. Once a week: the Scripts tab of the dashboard, and the fans whose Scripts used counter turned red.
Result: the alerts do most of the daily job and you open the app when something needs you.
Details: Daily routine
Checklist
- Account created and email code confirmed
- Balance positive, with enough for the next renewal
- One Telegram license bought
- Bot created in BotFather, from an owner account, token saved
- Creator added with the exact @username and the token
- License assigned, Renew on
- Telegram Premium active on the creator's account
- Secretary Mode on, bot connected in Telegram Business
- All 5 permissions on, Back pressed, connection verified
- Media uploaded, every file Ready for AI
- Two scripts created and switched Active
- Settings Details and Additional info filled, Submit clicked
- AI switch on, status Live
- One test message answered, checked on the Fans tab
- Notification group connected, AI Disabled and Rate Limit on